While these activities are ideal for early childhood, you can adapt aspects of it to challenge older kids too. You’ll see that I try to keep this art lesson very simple to start off with, but you can add in something like primary and secondary color concepts or color mixing.
With babies it is imperative to use one motion at a time; like smushing paint in a baggie. Splat painting involves dropping paint from above,, or flinging paint on a brush or tool. Spreading paint using a brush or tool is simple but fun for them. Smashing paint, is a great activity and it can include slapping dabs of paint on paper or another surface .
Sticking art supplies or materials together or combining supplies means demonstrating how to bond two objects together with glue or other ways of sticking items together .
No matter how old your students are, even mixing colors can be therapeutic. It’s soothing, relaxing, and can relieve stress. Giving toddlers the opportunity to play like this also helps them develop the wiring in their little minds.
I recommend setting up Hopeful Art on a regular basis—maybe even once a day—so their understanding of creative explorations consistently grows and deepens. Most of the time you will be amazed at ways they create a unique project with the skills that they have today.
You Want us to Create Art with What!?!
Baby Artists
Making art with your baby will not only put some fun in your day, it will develop their fine motor and visual skills as well as their eye hand coordination. The earlier that you start developing those skills, the more confident they will be in using the sense of touch in exploring their world. Most of my students and children love being able to change the appearance of a piece of paper or another base by marking, stamping and painting on it. Hope wanted to make EVERYTHING “pretty” so certain supplies had to be put out of her reach.
*Art challenges their eye hand coordination so I always like them to be able to feed themselves before starting them in any art.
**NOTE: Allow them time to experience and explore new supplies and tools. They will use all their senses to check them out. You can bet on it.
"Mom Brandon is eating my crayons”
It also gives them very creative experiences while they explore and discover the properties of new art supplies and tools. They may even come up with innovative and creative ideas on how to use something in a way that you didn't think of. It’s always fun to watch. Let them explore and try to use them in their own ways, which is great for making and tinkering as they grow older. So don’t correct them because they are developing their own creativity which is a huge asset in today's world.
They start out not knowing how to put two things together to make art. So use books, videos on the computer, television, or a demonstration from yourself to give them a little bit of an idea of how to use them. They get excited to change the visual properties of what they are working with.
Hope used to see something plain and wanted to make it “pretty”. I thought that was great, because both my sisters made things “pretty” in their jobs as florists. The first time that she was at a florist shop she was about five months old. She loved to watch their hands move as they made an arrangement and to play in the displays (which wasn’t always wanted). Unless they had a camera ready.
At first we used household items and homemade supplies so they would be safe (in case they explored them with their mouths) anything pourable was mixed with corn starch for paint. And anything peanut butter, pudding, yogurt, cookie and cake mixes were quickly made into playdough. We used pre-cut shapes, index cards, paper plates, computers and copy paper for them to paint, decorate, and draw what needed to be drawn on a project for them before giving the art tray to them.
Those first art experiences are so incredible to be a part of!
Watching babies as they play, explore, and create is such a special thing and one neither the baby or mom will soon forget. Did you know that babies can begin exploring art when they are just a couple months old? "How" do you ask? With some fun taste-safe paint recipes and mess-free art activities!
Here are some of our Pre-Art Motion Challenges
Protect all surfaces from stains from the dyes in food coloring, Kool aid and Jello
“We really want them to feel their creativity was important to the project…and that they did the finishing touches themselves. Babies need projects where they learn one thing at a time. I often call them “art motions”… like squishing, slapping, poking, moving, shaking, spreading, marking, pressing, stamping etc.”
Process Art for Babies to Grandmas
Slapping Paint- Watercolor Paper and Paint in a Plastic Bag
Pour paint on a plate, press cookie cutter into paint and move it onto paper
art Experiments Baby Infant Babies Toddlers Tots Incredible BabY
More Hopeful Art Inquiries
All “Hopeful Art” is really just an adventure or ART-venture with creative supplies (ARTventure) with more of an experiment in how to use them. When art buddies (parents, teachers. care takers) look at it that way, they can set out supplies (like an invitation to create or a provocation) and simply hope it becomes art. Simply set out a fun surface for them to create on, fascinating tools to create with, and lastly some super interesting supplies to test out in the trial and error phase.
Kids seemed to enjoy the open ended challenge and to wonder what they can create, experiment with the selected items, and explore more ways to use them. Adapt and Repeat…
I love this method because it is basically handled like a science experiment. So if they don’t like their project, adapt and repeat or just claim that the combination of tools or mediums just didn’t work. Just like in a science project. If their confidence seems down, finish with something that you know they are able to do and will enjoy doing it. Notice what they like to do or don’t like to do, what they can do independently, and what tools are difficult for them to use.
Every child comes to the art table with a different skill set. And with that skill set they will use the supplies in a totally unique fashion. Whether or not they like the end product is not important. It’s whether they enjoyed or learned from the process that they chose to use.
Processes and art skills to demonstrate
Using crayons or markers Mark making for littles Using stencils or silhouettes Using fun paint brushes in different ways Using different surfaces to create on Using art stamps of all kinds (inclding fruit and veggies) How to spread glitter, tissue paper, natural elements How to use clear contact paper for easy collages and suncatchers How to make a home (or background) for a sticker, stamp or silhouette Using stick glue, school glue, mod podge, tape How to to create interesting layers in a collage How to tear paper for a collage or suncatcher How to use scissors or tearing paper Choosing which paint or glue to use How to make drawing fun Using embellishments and nature Sort your supplies into surfaces, tools, and mediums or materials.
If you want a provocation question- “What can you create?” will work in most cases.
I always had stencils or silhouettes, stickers, glitter, glue, cookie cutters and DIY stamps out for Hope. She loved to embellish and add media to every background. My students and boys did not use them as much. So adapt your activity to your child's abilities and personal interests but don’t buy all your supplies at once. Keep slowly adding new supplies to keep their interests.
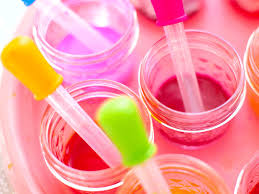
So try putting a few things out on a tray. I always tried the invitation as well. Sometimes the trial and error process just flops at first. It’s OK, just set it aside. Discuss your options or your suggestions out loud. Then fix or replace the apparent component that caused the problem. The set of droppers above, require advanced fine motor skills. They will be difficult to impossible for some to use. However, the artist can learn from it and we can tweak(or adapt) it a little and it works. This teaches problem solving which is vital to any inquiry based process. Simply replace the dropper with another tool that they have experienced success with.
Index cards Paper plates Coffee Filters Paper towels Contact (or sticky) Paper Kiddie pools Bathtub (easy clean up) Foil Crumpled Wax paper Contact Paper Various kinds and colors of paper Card stock Coloring Small rocks Small pieces of bark Newspaper Paper bags Butcher Paper or newsprint paper Pinecones Crayola doodle board Color & Erase Reusable Activity Pads Wipe off board Scrapbook papers Windows Paint easels
Quick Ideas
Safe Supplies
Jello Yogurt Pudding Kool-Aid Whipped Cream Crayola Crayons & Markers Crayola washable finger paint Crayola Large Crayons Jumbo Washable Watercolors Reuseable stickers Foam stickersVibrant Colors Washable Paint Sticks Jumbo Bath Crayons Bath Markers Crayola Bathtub Finger Paint Soap DIY Homemade Supplies Juice and any beverages Colored non-toxic glue DIY -Homemade paint DIY Homemade play dough Flour and water glue Corn Starch Glue