Making Art Possible
Superscript

Sensory Art

WHY SHOULD YOU DO ART WITH YOUR BABY?

Art is an amazing creative outlet for me, but it’s actually beneficial for the little ones, too. We all know the importance of reading to our littles and letting them explore the books, touching them and learning colors and shapes. But exposing them to art is different because they can actually create something, even if that something is a bunch of squiggles and smudges.

As babies grow and develop, they are so curious and open to trying new things.Little ones absorb incredible amounts of new information, and they need to process what they learn in a safe and playful way. Art allows them to explore and express feelings and the world around them in a creative manner.


It develops their fine motor skills

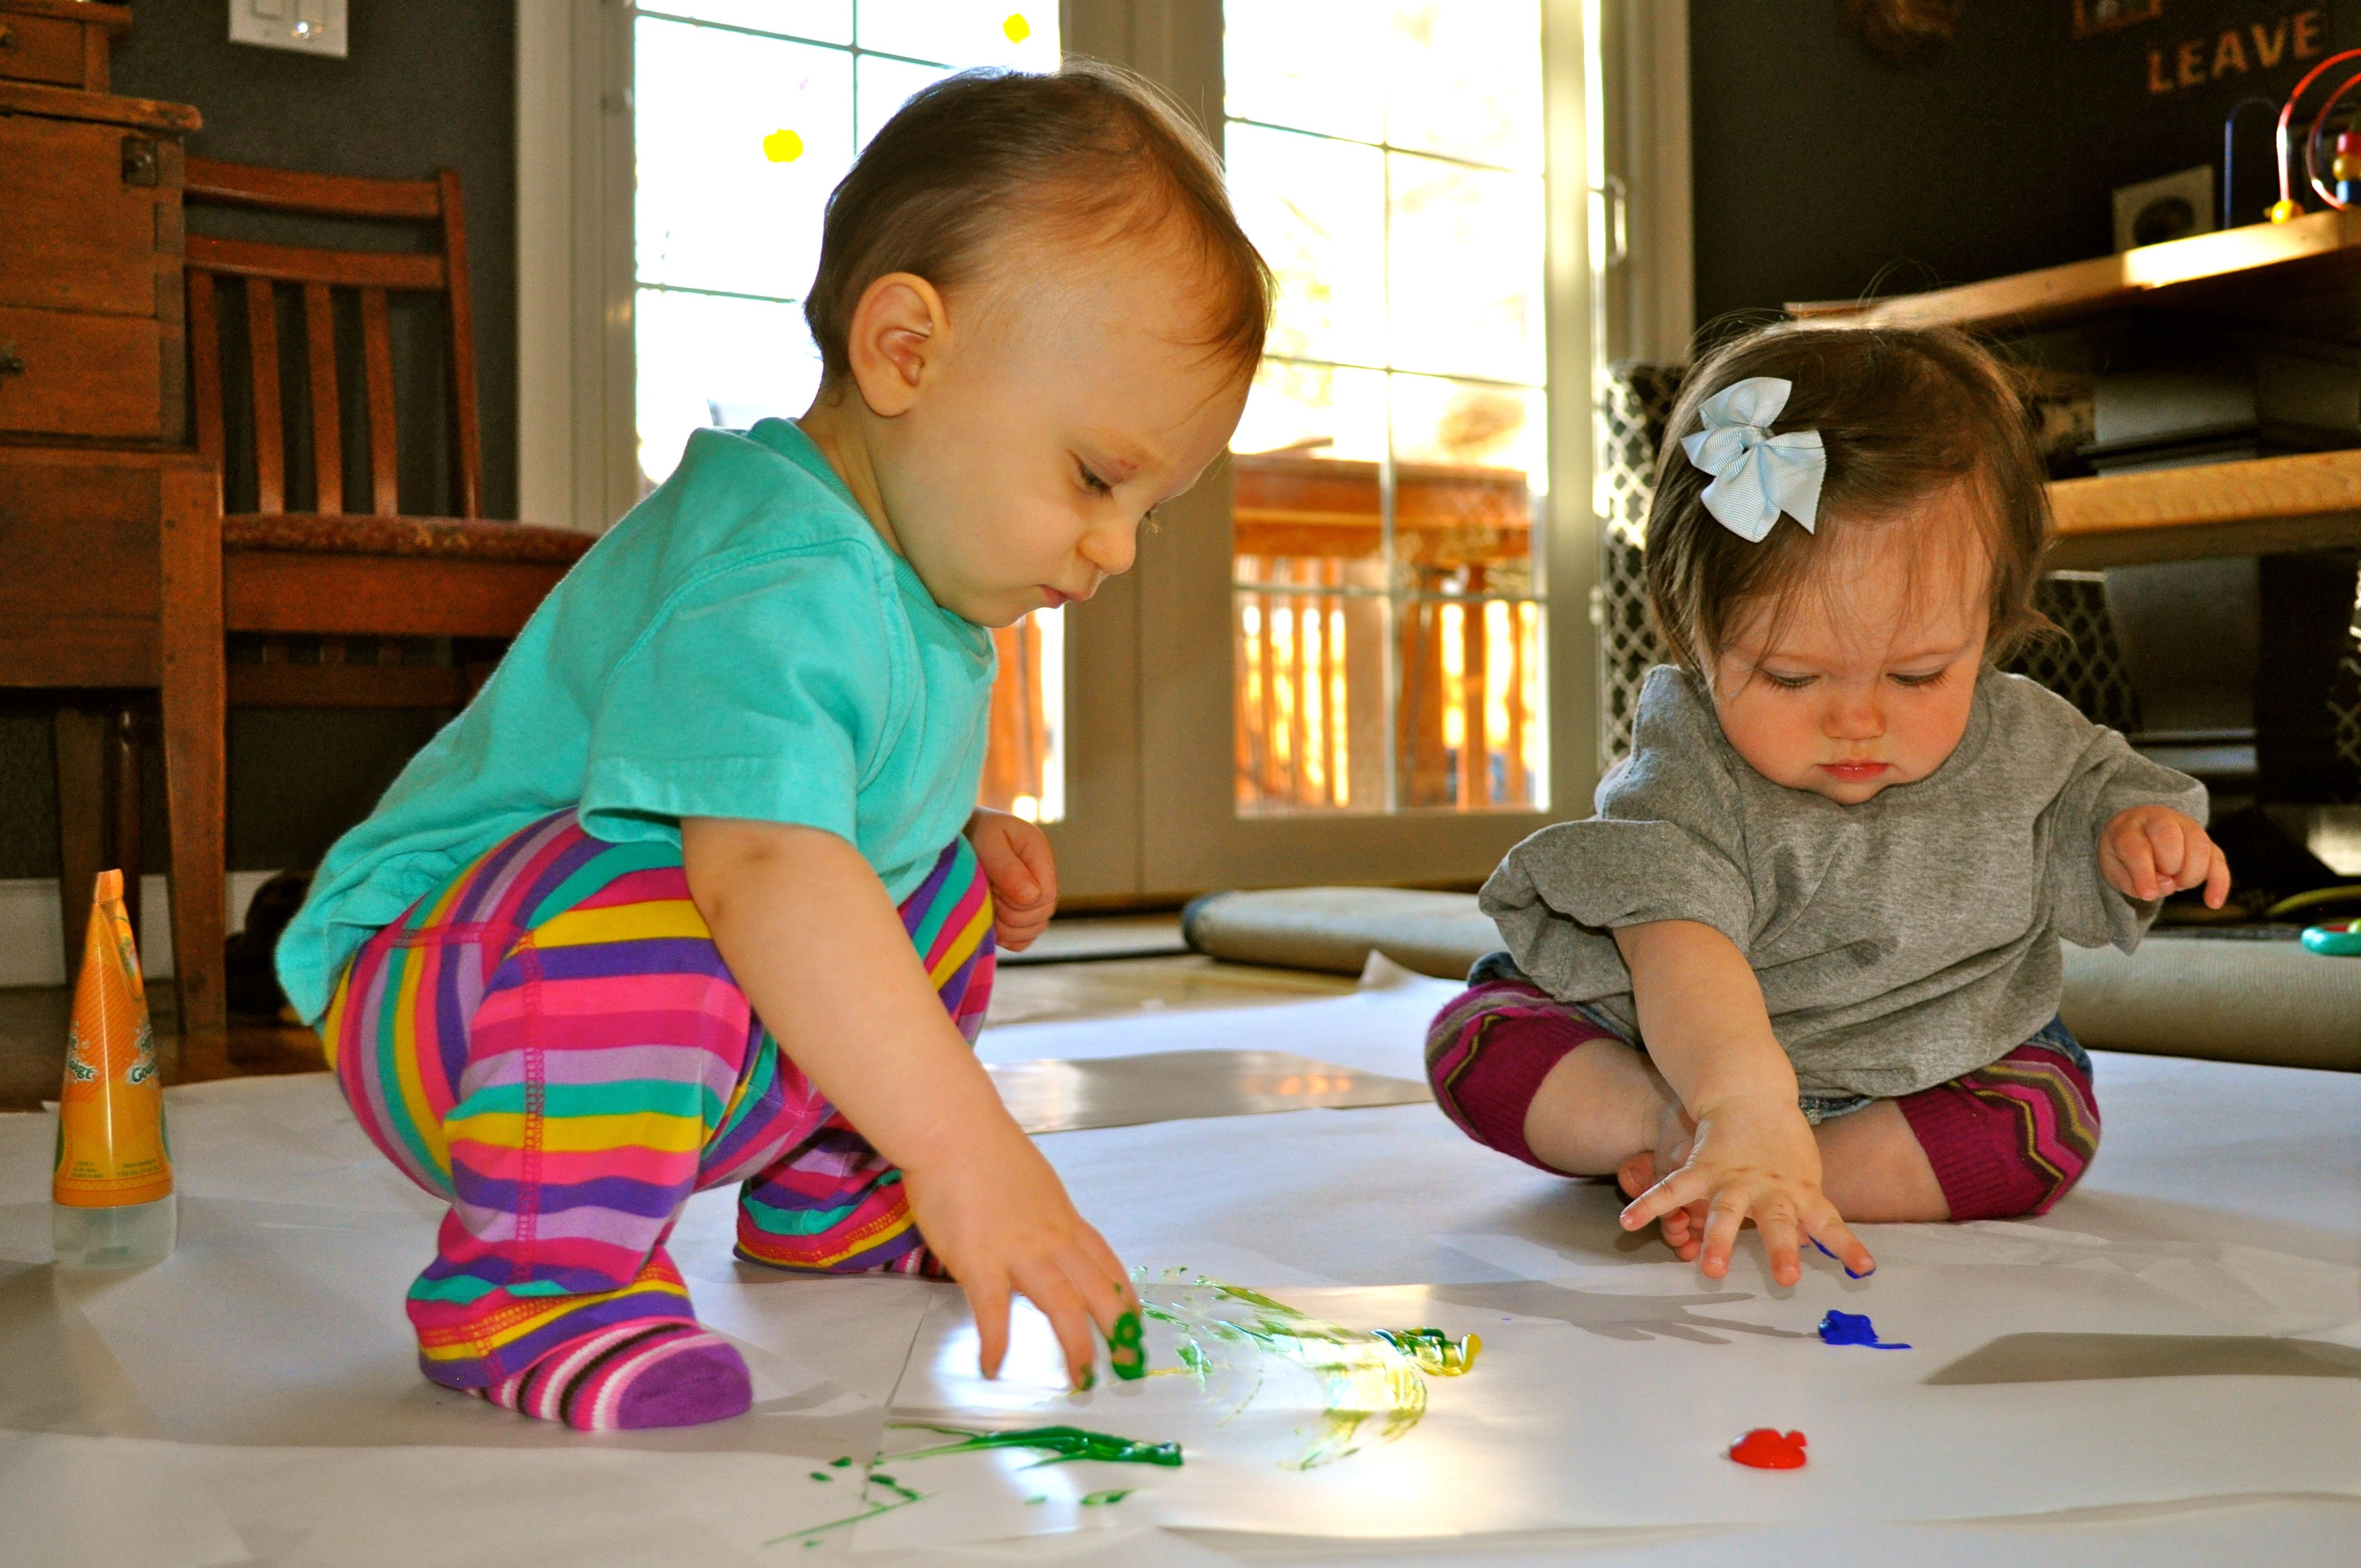
Art is an activity that can employ all the senses––sight, sound, touch, smell, and taste––depending on the activity. Finger painting with your baby will help her develop her fine motor skills. As she touches the paint and moves it around on the paper and changes the look of the paper, she learns what her hands do and how she can affect the environment (her paper) by moving her fingers through the paint. 

It stimulates their cognitive skills

Art also helps babies develop their little brains. They learn colors and textures from paint and paper, and as they get a little bigger, you can help them draw or paint shapes. Babies are like sponges at this age and soak up so much information from every experience. Children’s brain synapses fire away as they experiment and create by squishing paint between their fingers, mixing colors & materials, or drawing from imagination or what they see in front of them.

It promotes their future creativity.


Creativity is the ability to think outside the proverbial box, to string two unrelated ideas together in a new way. Solutions to major problems and breakthroughs of all kinds are linked to creativity. The ability to be creative is vital to the success of our children and the well-being of our world. 

It encourages the experience of exploration

Creative art is an exciting sensory experience for infants and toddlers. It is about the process of arousing curiosity then creating to an opportunity explore interesting artistic elements along the way. – It’s not about making a product. A joyful experience of exploration brings an admiration for the various materials and what can be done with them. The materials have various attributes (e.g. textures, smells) and it is fun for young children to explore all of those in a loving environment.

The process of discovering through the senses is what is most important. Infants and toddlers delight in opportunities to participate in sensory art experiences every day!

It’s fun!

No-brainer. Most kids enjoy getting dirty, and finger painting with your baby is a surefire way to get some smiles, giggles, and squeals. And it’s pretty fun for mom and dad, too!
Once you’re a mom or caretaker, all you want to do is make your baby happy and genuinely enjoy their time with you. Sharing a playful art experience with a child can create a joyful bond that leaves both of you desiring more.


When we encourage our children to explore art, we encourage them to master themselves, their bodies, and a variety of tools and techniques. We give them many ways to express themselves.

According to the International Child Art Foundation, “Research indicates that a child who is exposed to the arts acquires a special ability to think creatively, be original, discover, innovate, and create intellectual property—key attributes for individual success and social prosperity in the twenty-first century.”

How to tell if your baby is ready for art?


MAKE A MINI WATER TABLE

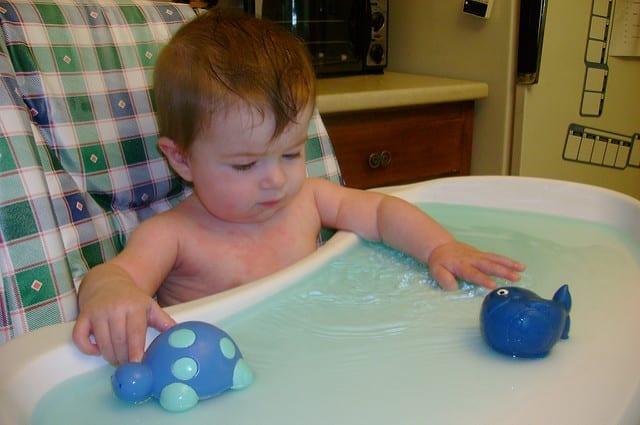
Maddy in her baby water table

HOW TO MAKE A MINI WATER TABLE FOR BABIES

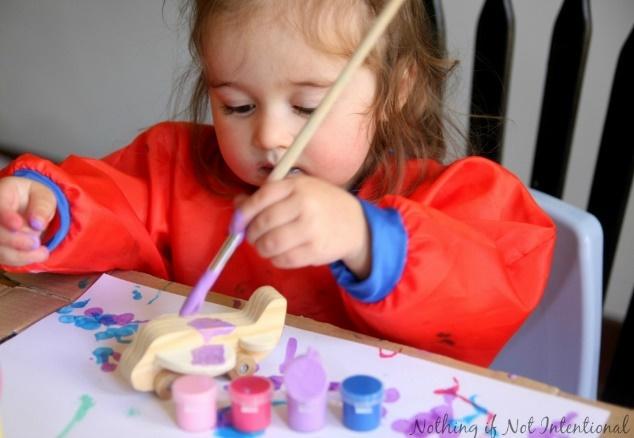
If a baby can feed themselves, he/she is able to have a little bit of control over a paint tool. If they can hold a fork, they can hold a short, handled paint utensil. 

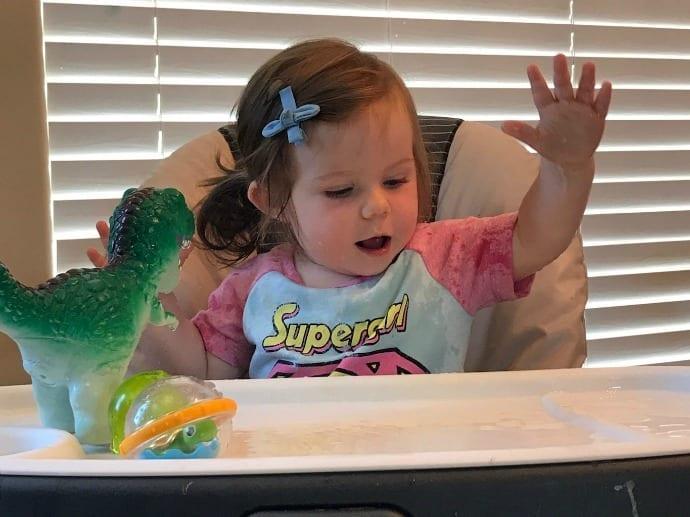
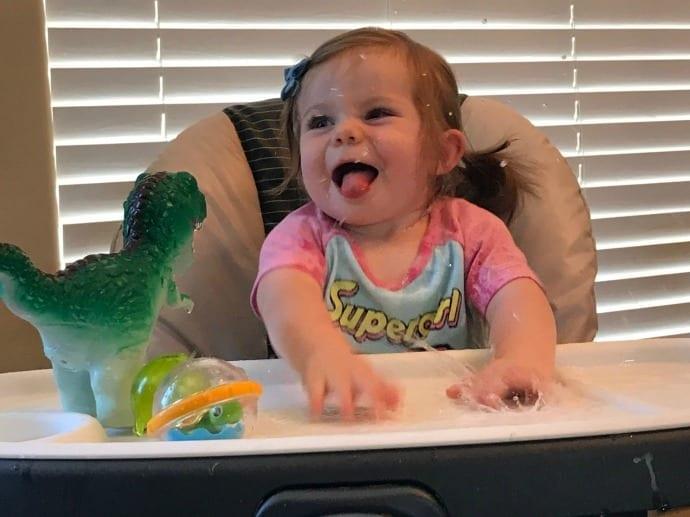
So that is one thing down. Turn baby’s highchair or Bumbo tray into a mini water table (works indoors or on the patio — mind your nicer floors!). Only drop a little bit of food color or Kool-Aide in the water if you do not have juice. (It will stain your baby’s clothing, so we just wore a diaper.) If the colored water interests them and inspires them to explore ways of spreading, splashing and even slapping it to watch the reaction of the water means that they have curiosity, and that their creativity is developing. I could see Hope’s wheels turning…What happens if I do this or that as she moved orange juice around like it was paint being totally intrigued by the patterns she could make.

How to make a mini water table for babies


Make a mini water table out of your high chair and other water play ideas for babies

As discovered on ParentHacks, we also adore this tip to fill baby’s highchair tray with water just for a fun way to cool off on hot days. Mama Misty suggested this activity for hot, housebound babies everywhere. I especially appreciated trying the high-chair-as-water-table idea while I want to enjoy playing with my children while containing their energy to a pint-sized area.

Misty reports: Baby Madeline’s highchair has a very deep lip, enough to hold about half an inch of water. Misty filled that with tap water, stripped her down, and let her splash around as she wants. It is amusing to see her reaction when she splashes herself, and her obvious enjoyment of the new experience.

Infants and Toddlers: Sensory Art Experiences

Adapted from Bronwyn Bronwyn


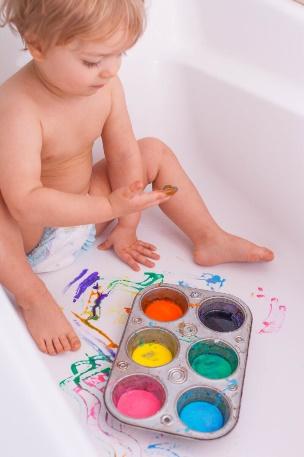
Toddler Paint Bath

I love to introduce kids to new art materials, even at a really early age. The joy and wonder that the littlest ones have while smooshing and splattering paint is pretty magical. It can be especially challenging for parents seeking a safe, engaging, age-appropriate art experience for their youngest of children, toddlers, and crawlers. Fortunately, making art with babies can be tons of fun right at home.

When creating with your little one, remember that everything is new to them; everything is fair game for exploring in every possible way. It’s how they learn about the world around them. Art materials are no exception.

 – Things to AVOID 

•Distractions like your phone or company.  Stay right beside your little on to encourage them.

•Coloring books or coloring pages (unless you are using them to make stencils or templates).
•Activities where the adult does most of the work (such as cutting, pasting, stapling, drawing,
  manipulating materials). Just scaffold and prepare their difficulties in a couple of areas, not the whole
  project. Just put it aside for later when their skills improve.
•Telling a child what to draw, what to paint, or what to make. Let them choose what they want to do
  with the materials set out on a tray.
•Expecting that a child will produce something recognizable or will make an imitation of a real object.
  Young children are not making products – they are experimenting or enjoying the process.
•Finishing a child’s work to make it “better.”

Once an adult has manipulated the child’s work, it is no longer the child’s experience or the child’s work ‐‐ it now belongs to the adult. 


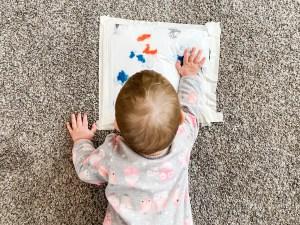
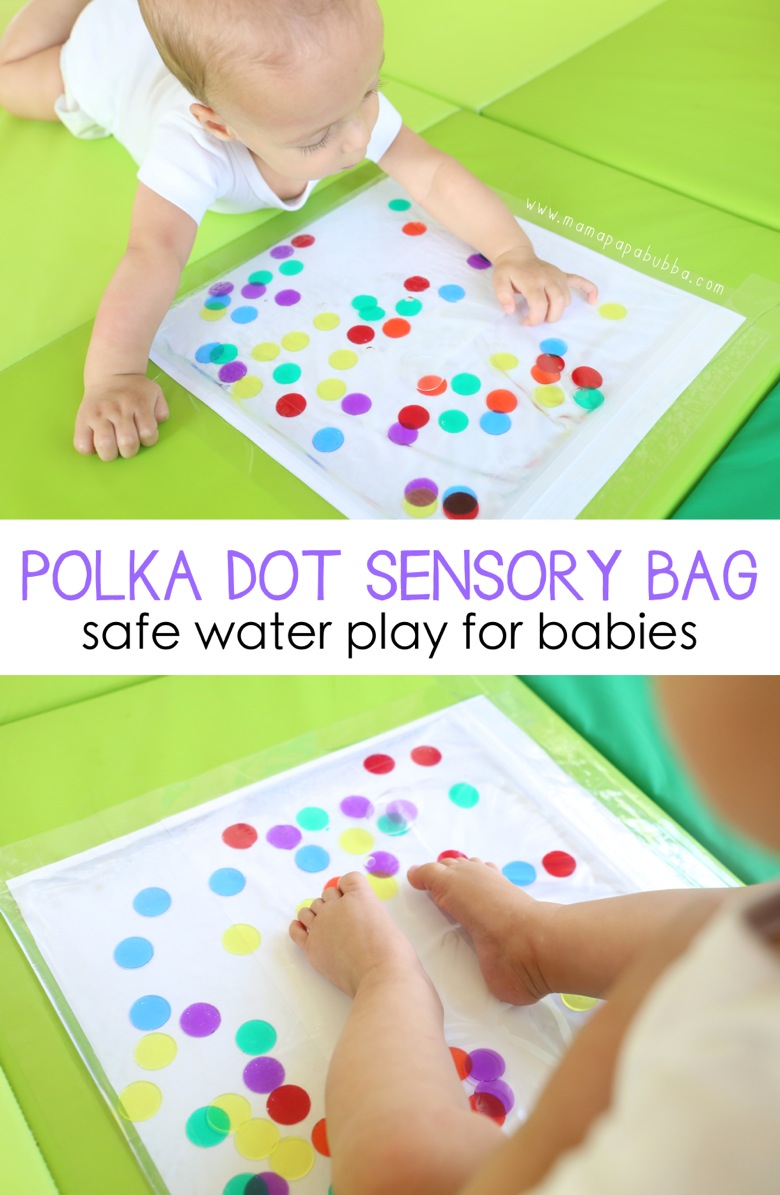
Tummy time sensory bags


A baby playing with a toy

Description automatically generated with medium confidence

What are appropriate sensory art materials and experiences for YOUNG INFANTS?


•Variety of textured fabrics to explore such as flannel or felt, corduroy, satin, silk, taffeta, netting, knits, denim, lace, fur
•Variety of non‐toxic papers to explore such as waxed paper, butcher paper, rice paper, tissue paper,
  cellophane, cardstock, construction paper
•Crumple, tear, shred and wave activities
•Contact or Sticky paper
•Edible or non-toxic Paint
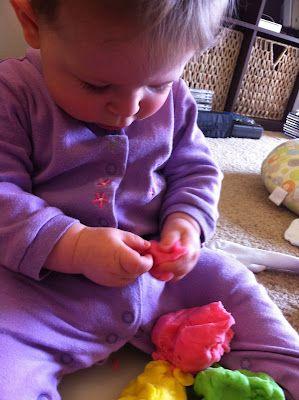
•Edible or non-toxic playdough
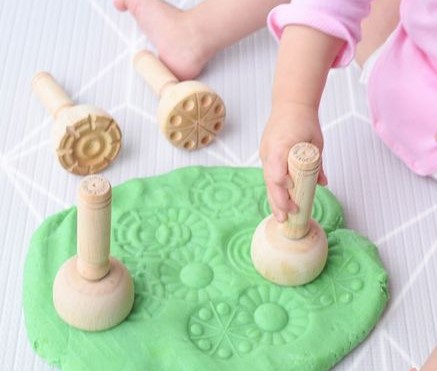
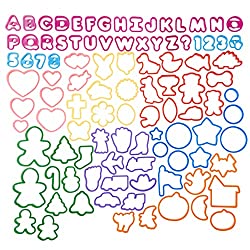
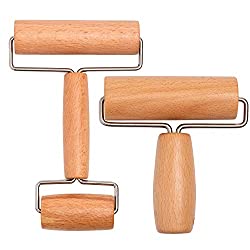
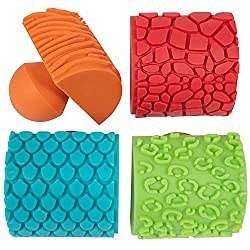
My First Crayola Tools and Supplies•Tools that encourage creativity- stencils, cookie cutters, glitter, stickers, rollers, shaped sponges or stamps etc.

A picture containing table, person, indoor, sitting

Description automatically generated


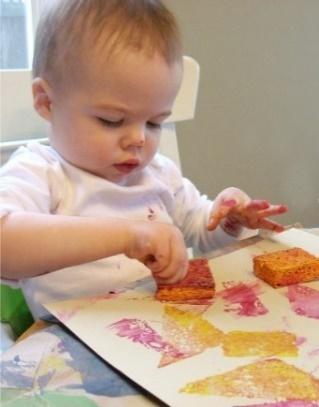
sponge painting for babies and toddlers

What are appropriate sensory art materials and experiences for MOBILE INFANTS

(infants who can move around on their own)?

•Finger paint (painting directly with their hands)
•Paint on trays (no paper)
•Paint with water
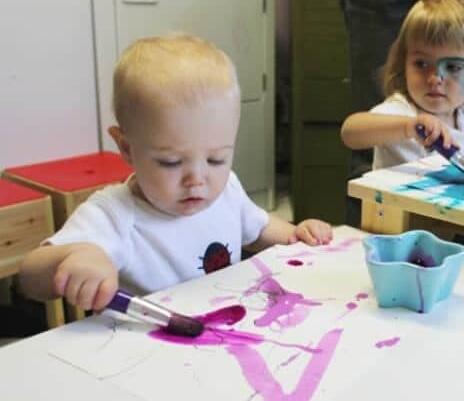
•Use stubby brushes (5‐6 inches long) for painting
•Contact or Sticky paper
•Draw using jumbo crayons and large pieces of chalk
•Use large pieces of sturdy paper for drawing or painting
•Paint with water or draw with chalk outdoors on buildings, sidewalks, blacktops, or tree trunks
•Use soft, pliable playdough that can be easily manipulated with hands
My First Crayola Tools and Supplies•Tools that encourage creativity and fun- stencils, cookie cutters, glitter, stickers, rollers, shaped sponges or stamps etc.

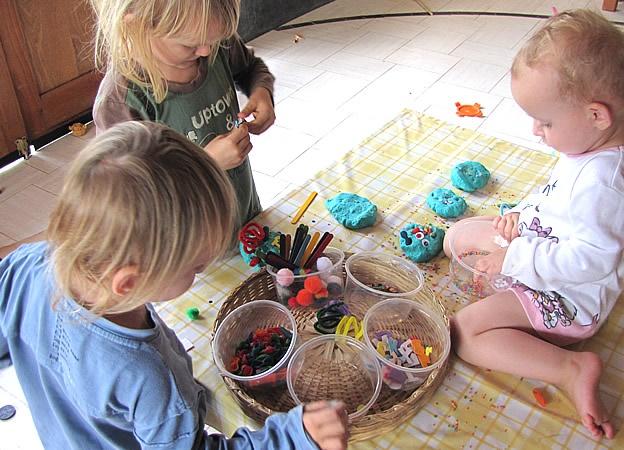
lets play with loose parts


What are appropriate sensory art materials and experiences for TODDLERS?

My First Crayola Tools and Supplies
•Toddlers may prefer to stand or sit when painting – vary the experiences
•Paint using paintbrushes (flat bristle brushes – nylon hair) with stubby handles
•Draw using large, stubby crayons, large pieces of chalk, or water‐based felt‐tip markers
•Use large pieces of sturdy paper
•Contact or Sticky paper
•Use butcher paper, newsprint, manila paper ‐ in various sizes and shapes
•Finger painting on trays, mirrored surfaces, plastic wrap, or large pieces of paper taped to the floor or a
  table
•Use commercial finger paint or dry (tempra) paint mixed with liquid starch
•Make goop or gak
•Use non‐toxic shaving cream
•Provide both white and colored paper with various textures for exploration or tearing activities •Provide different textures and colors for all experiences
•Can use an eye dropper to add coloring to experiences (good when using corn starch to fingerpaint) •Provide soft, pliable playdough – easy to manipulate without tools
•Provide utensils to extend experiences such as a potato masher, blocks, scoops, etc.
•Tools that encourage creativity- stencils, cookie cutters, glitter, stickers, rollers, shaped sponges or stamps etc.

Note: When you first offer paint, limit paint to one or two colors. Gradually, add more colors but only one at a time.

A baby sitting at a table

Description automatically generated with medium confidence


         What are appropriate sensory art materials and experiences for TWO‐YEAR‐OLDS?

My First Crayola Tools and Supplies
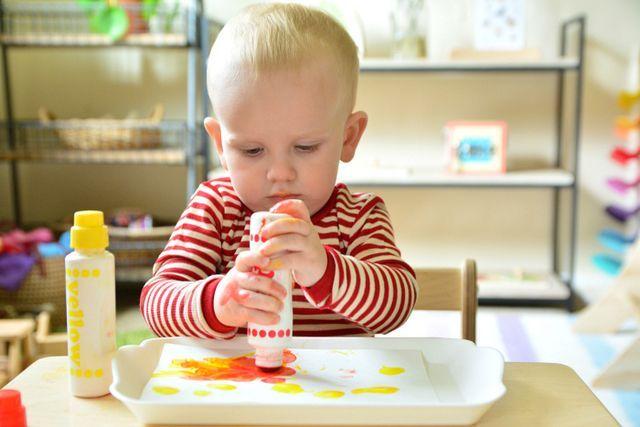
•Drawing and painting with Bingo Markers 
•Provide different types (colors, shapes, textures, sizes) of paper (poster paper, tissue paper, crepe paper, corrugated cardboard, butcher paper, newsprint,)
•Use fingerpaint paper coated with liquid starch & sugar water (great for chalk creations)
•In addition to brushes, add – feathers, twigs, eye‐ droppers, foam brushes, toothbrushes, vegetable brushes, sponges
•Add texture & smell to painting experiences:
    Adding this: Makes paint:
    Flour -Lumpy
    Corn Syrup -Shiny and Sticky
    Sand/Sawdust-Rough and
    Gritty Epson Salt -Sparkly
    Liquid Soap -Slimy
•Printing: Make your own stamp pads by gluing felt onto plastic trays
•Add rubber stamps, sponges, corks, soles of old shoes, potato masher to print making experiences •Collages: Collect colorful yarn, ribbons, papers, magazines/catalogs, material scraps, recycled materials – make 3‐D collages
•Use liquid glue
•Use small, blunt‐nosed scissors, if appropriate      

Considerations for Successful Experiences/Activities
•Plan the sensory art experience area near a sink
•Protect the floor and other surfaces
•Protect children’s clothing (or have sets of clothing that are only used for art experiences)
•Provide surfaces at different heights – children enjoy art activities standing or sitting at tables as well as on the floor
•Keep only the materials being used by the children within reach on a tray in front of them (keep all other materials out of reach of the children)
•Display select art materials for toddlers and twos on a tray or in a bucket – only keep a few materials available at a time
•Display children’s artwork – visually – for all to enjoy (without manipulating the artwork – keep it exactly as the children made it)

A picture containing person, table, indoor, baby

Description automatically generated


My Tips for Painting with Infants
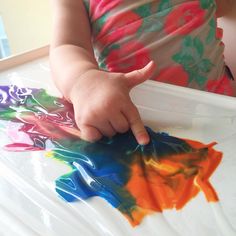
A baby lying on a couch

Description automatically generated with low confidence

Painting with infants does not have to be scary and it is a great way to explore with your baby at home. Many moms are always searching for activities to do with their infants, because it really is a fun way to play with baby and make a great keepsake or gift!

Painting with Babies – Tips!

 Easy Homemade Paint Recipes:

Pudding Paints

Flour paints


Painting is one of the activities that I know that parents fear the most with Little’s. There are a few ways to make painting a lot less stressful. Hopefully, these baby/toddler painting tips will help! Babies just love to paint. 
https://tse3.mm.bing.net/th?id=OIP.pf0wIa5NqDk8YsPFZznV1gAAAA&pid=Api&P=0&w=300&h=300
  1. Be prepared
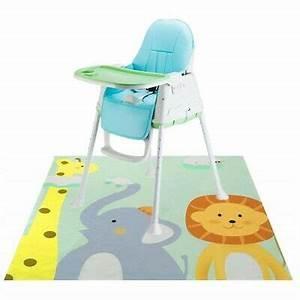
    Even I don’t have painting as a daily activity. It’s something that I plan for and set up. Designate an area for the painting, put down a drop cloth, plastic tablecloth, or Splat Mat, and try to keep everything contained.

  2. Plan for more than 1 painting 
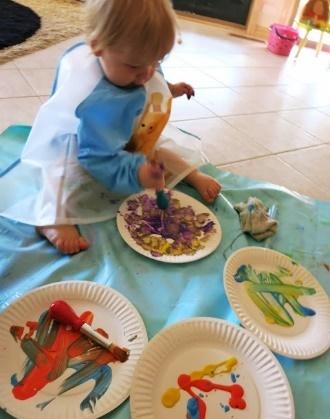
    It’s rare that a toddler only wants to paint one picture. Have lots of paper ready, a variety of brushes, and different items for them to use. It’s much easier to do multiple painting activities all at once than to do one each day – trust me! We started on small paper plates, recipe cards, and coffee filters for our canvas.

  3. Have a big bath towel ready
    They may need to be wrapped in it to get to the tub. If you are squeamish about the mess that might be made if you let them loose after painting, then a big towel could be a big help. Who doesn’t want a hug after a painting activity anyway? It’s a win-win. 
homemade paint baby.jpg

4. Have your cleaning supplies ready
I always keep some wipes and a towel or cloth nearby. I know they’ll get messy so it’s much easier to be prepared..


Here’s my Step by Step Guide
for Painting with Babies

1. Gather and prep your supplies:
https://sp.yimg.com/ib/th?id=OP.2oS1miPDYMbaGA474C474&o=5&pid=21.1&w=96&h=96

Several pieces of construction paper (I gather about 6 pieces)

Paint

Masking tape

Newspaper or large sheets of butcher paper or packing paper 

High chair and tray or another solid work surface

Damp paper towels, washable towel, or baby wipes

2. Protect your Painting Surface

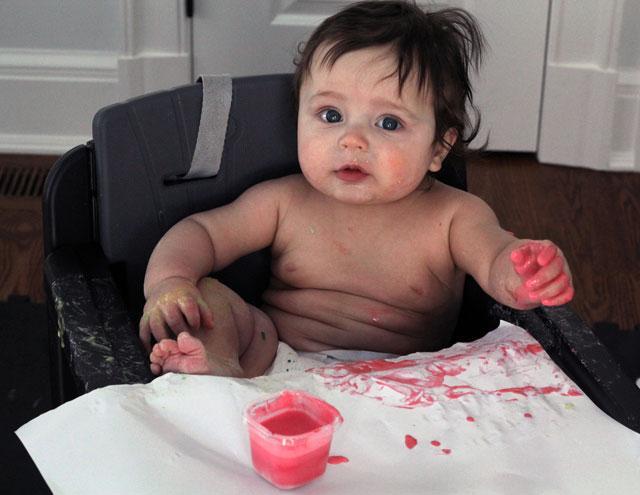
 I like having baby paint using the high chair tray because on our chair the tray is plastic. If you have a wooden tray just wrap it with plastic wrap if you are worried about paint sticking to it or staining. If you have to push the high chair up to a table, you can tape down some newspaper or butcher paper with masking tape to protect the surface.

3. Get baby ready for some painting:

1) Undress baby leaving on their diaper/pajamas or tee shirts that you don’t mind staining.

 2) Place baby in a secure seat or a high chair. Most high chair trays are washable. In 6 years of having children, paint (or food) has never stained mine. Plus it fits anywhere!

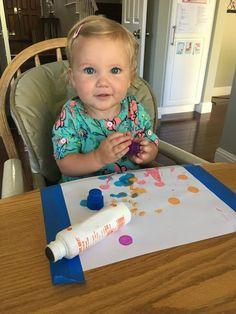
 4. Use masking tape to secure the paper

Babies do not have the coordination to hold the paper and keep it from moving around while finger painting, so taping it down is essential.

 5. Use washable tempera paint. 

Unlike acrylic or craft paints, tempera paint is egg-based. This makes it non-toxic, and it easily washes out of clothing, carpet, and other unlucky bystanders. You can find tempura paint in the craft section of most big box stores (Target, Walmart) and also at craft stores (Michaels, Hobby Lobby).

Small hands sometimes lack the finesse needed to dip and drag paint from containers. An easy solution is to pre-dab the paint on the paper and encourage your child to swirl the colors together.

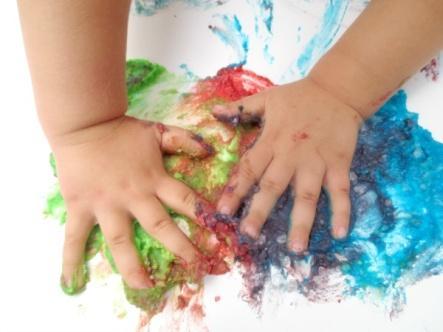
6. Let your child explore what they want to do with the paper with the paint.
baby fingerpaint.jpg

 You can help guide by saying things like, “You are painting! Move the paint around on the paper.” “Use your fingers and hand to spread the paint.” “Keep the paint on the paper and not your mouth.” Make sure you compliment them on their creativity!

Talk them through it and encourage them to use the paint in new ways. We sometimes think that since babies cannot talk to us, that they do not benefit from hearing us speak to them. That is false. Enriching play with language is essential!

 7.  Experiment with unique “brushes.” 

Kids love to explore the marks that unusual tools make. Let them paint with their toys, dab with Q-tips, or stamp with paper rolls. Even if you don’t own paintbrushes, a cotton ball held with a clothespin creates a similar effect. Most kitchen utensils can make a simple painting look interesting with their unique prints in the paint.

Model what they are to do if your infant is not moving their hands to paint on the paper, you can gently hold their forearm and gently move their hand around in the paint. Use words to talk about how the paint feels (slimy, slippery, smooth) or what it looks like (color words).

8. Use the baby’s interest to determine when the activity needs to end. 

Don’t let them work the paint so much that it ends up looking like mud. Instead, choose 2-3 friendly colors that go together nicely. For example, blue, green, and yellow are friendly. Blue and orange are not! Then simply change the paper while all the colors can still be seen. My oldest two painted about five papers each and then they showed signs of being tired. Some infants may be unhappy with their hands covered in wet paint, so getting one painting finished may be good. If your child gets upset, stop the activity and try again in a few days or more. Or cover the paint with saran wrap.

9. Allow time to dry their art --then show it off
You can let the paintings dry by simply using a piece of masking tape to secure the painting to an out-of-reach window until dry. (Any stray paint that gets on the glass will clean right off.) Then hang the painting up on the refrigerator or wall, or attach a label to the back to mark the milestone of using a new tool or supplies. For their first Christmas, I added a label and framed a few of my children’s first paintings as gifts for the grandparents.

I also included taking a small photo of the painting experience. Then the long-distance family can see the fun experience too.

Painting is a great way for babies to play and learn. It is an outlet for children’s creative energy and allows for a lot of language exposure and interaction.
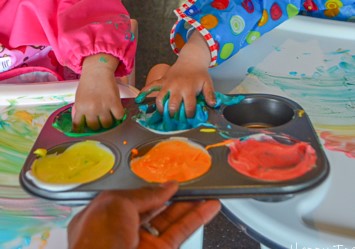
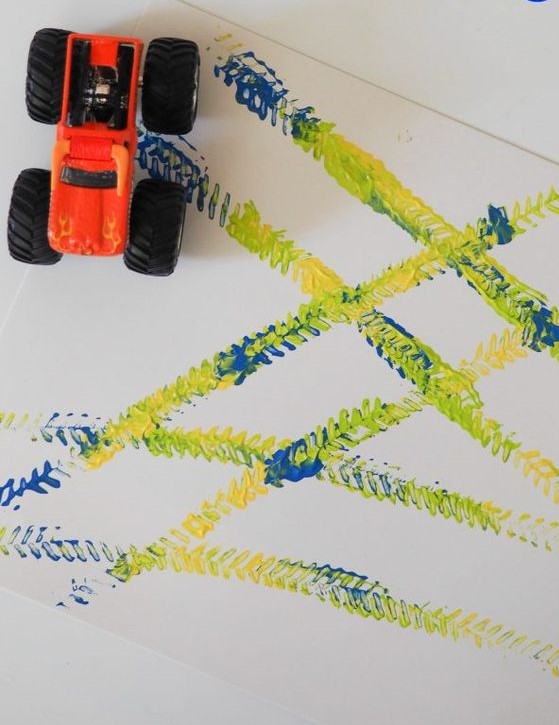

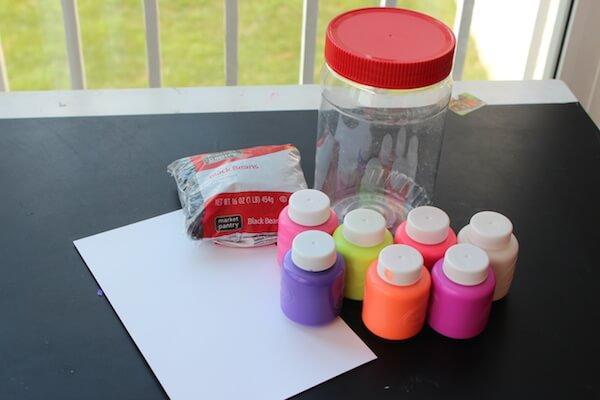
Golf Ball Art
A picture containing text

Description automatically generated

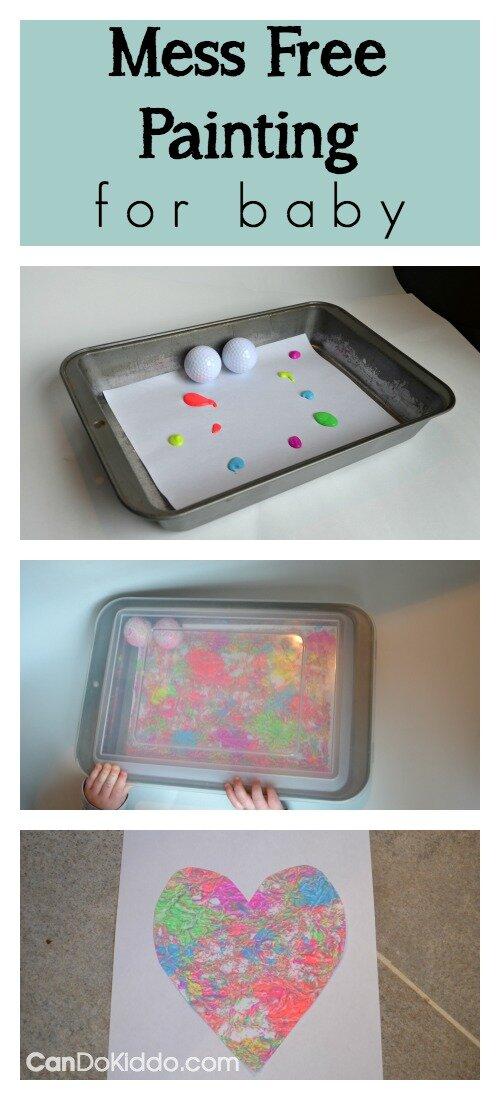
Supplies Needed:

  • non-toxic paints (I chose spring colors in keeping with the season but you can customize based on the supplies you have or upcoming holidays)

  • paper

  • tape

  • 1 or more golf balls (you can use other balls but golf balls give the painting nice texture and give the activity a great sound)

  • a lidded container, preferably with a clear top

The Process:

  • tape the paper to the bottom of your lidded container

  • add small globs of paint on different areas of the paper

  • add golf balls

  • close the container (tightly - add tape if it's not a 100% secure fit)

  • hand the container to baby - in Tummy Time, while seated, while standing at a low table - whatever position your baby is enjoying lately

  • if needed, shake the container to help baby understand the cause and effect of his actions and the noises and ball rolling inside

  • let the paint dry before removing from the container (the paint may make the paper soggy and prone to ripping as you un-tape it)

  • enjoy the painting "as is" or cut it into a shape and mount it on a larger piece of paper or cardstock

Even though baby won't be touching the paints, accidents happen and you may have plans to wash and re-use that container in the kitchen, so I recommend using non-toxic, washable paints. We used these Crayola neon washable paints

A picture containing text, worktable

Description automatically generated


Tummy Time Finger Painting Sensory Play


With a little creativity and some simple supplies, you can make Tummy Time fun for your little one AND tackle a very common challenge that parents face once their babies start to roll...

Learn more about helping early rollers (2-3 months) continue Tummy Time.
Discover ways to play with your bigger baby belly-down once he rolls out of Tummy Time.

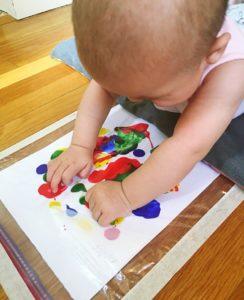
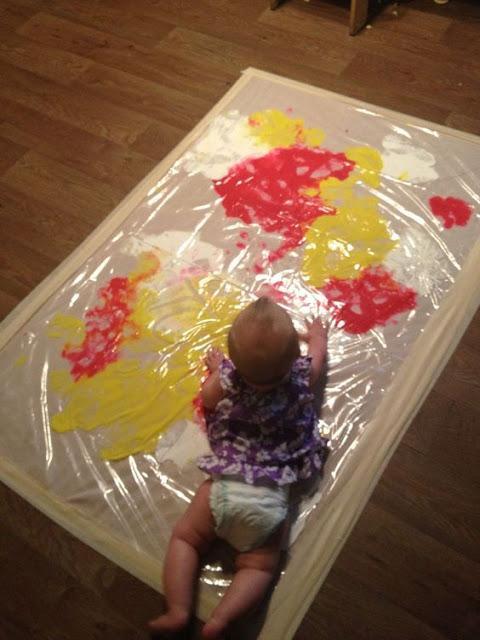
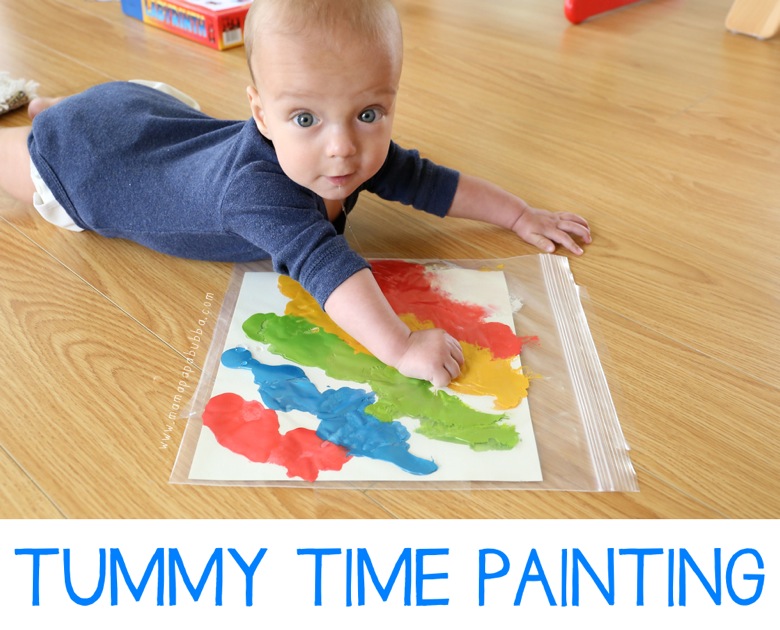
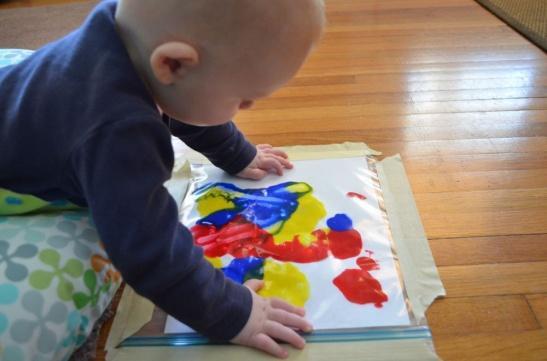
Fingerpaint in a Ziploc baggie is a great sensory activity for little ones and it's a hot activity on Pinterest. But I looked at what most consider an activity for babies who can sit up and toddlers and saw a SUPER Tummy Time activity. I used Crayola Washable Finger Paint. If your baby isn't yet reaching in Tummy Time, you can use a Tummy Time Pillow or nursing pillow under his chest to free his hands for play.

Even though Rowan is now fully capable of wiggling out of the Boppy pillow, he stuck with the activity for 5+ minutes. BUT, since he's teething, it often looked like this...
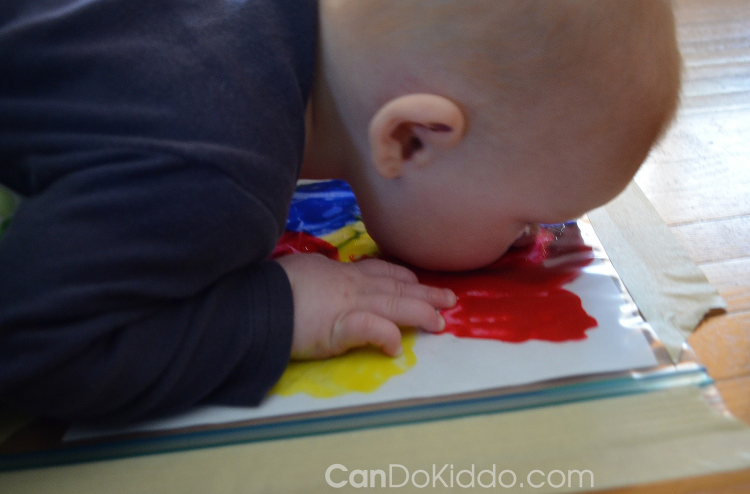
Giving new meaning to

Giving new meaning to "face painting".

You can also try this activity in a highchair if you have an independent sitter.
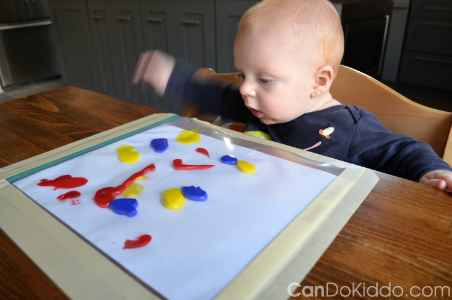
A baby playing with a puzzle

Description automatically generated with low confidence

To preserve your little one's artwork, simply cut the edges off the Ziploc bag and then peel off the top of the artwork. Lay flat to dry.
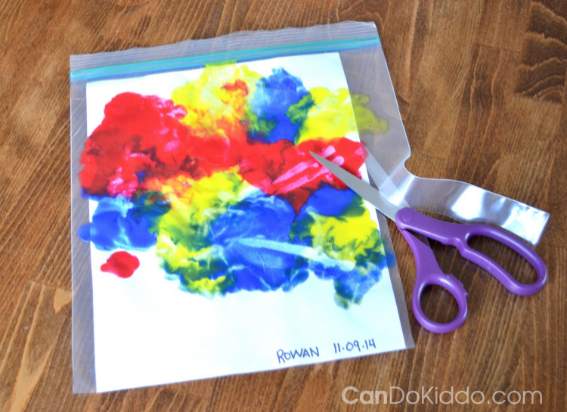
A picture containing text, table, indoor, floor

Description automatically generated

And, because part of being a pediatric Occupational Therapist is spending years perfecting the skill of keeping things from going in kids' mouths, I also unleashed my boy on some truly messy play with finger painting OUT of the Ziploc bag...but there were no clean hands to take pictures. Feel free to take a walk on the messy side, if you're brave! Here's a post with tons of great recipes for baby-safe finger paints from around the web

Edible Paint Recipe

Seriously fun and easy! Dylan is 6 months and we thought it appropriate in our lovely summer weather that we sit outside and create a little something together.
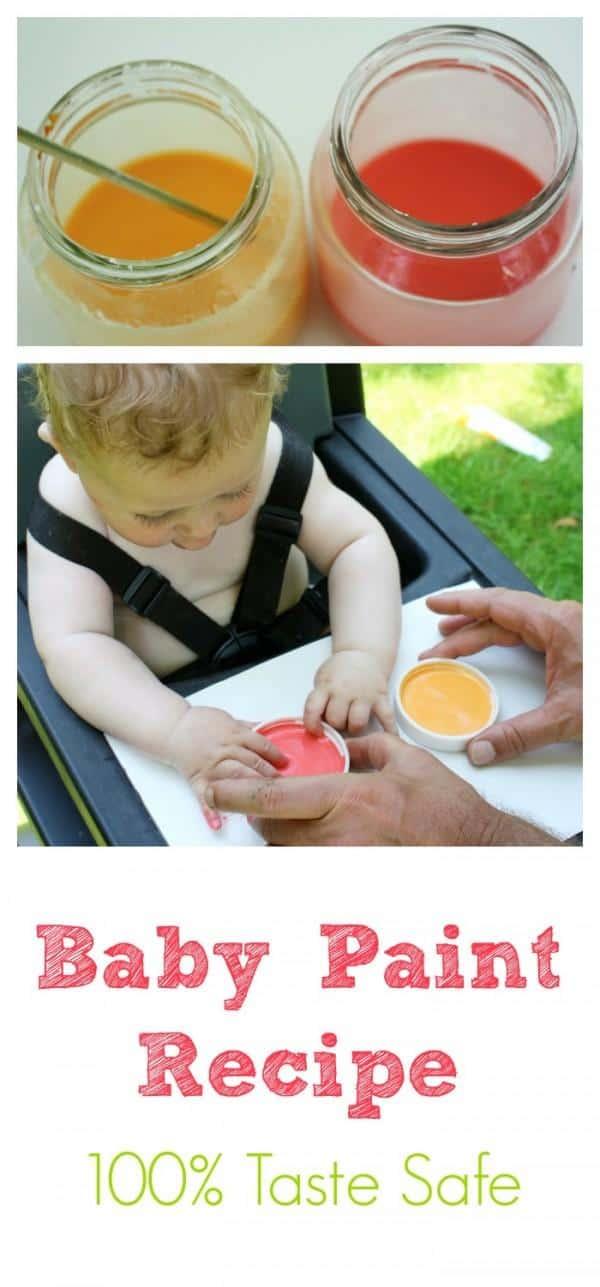
Make your Own Baby Paint - completely taste safe and so much fun! Great sensory art activity for baby!

I made baby paints – completely edible.

Funny thing is, this little man puts everything in his mouth, and this paint – he was not interested in eating at all…
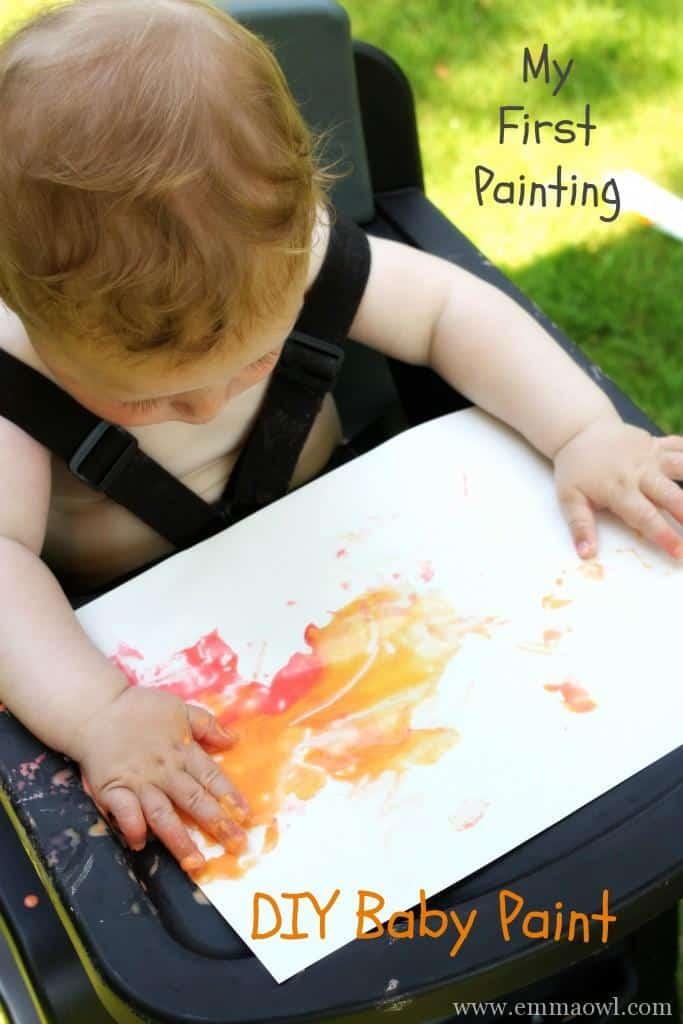
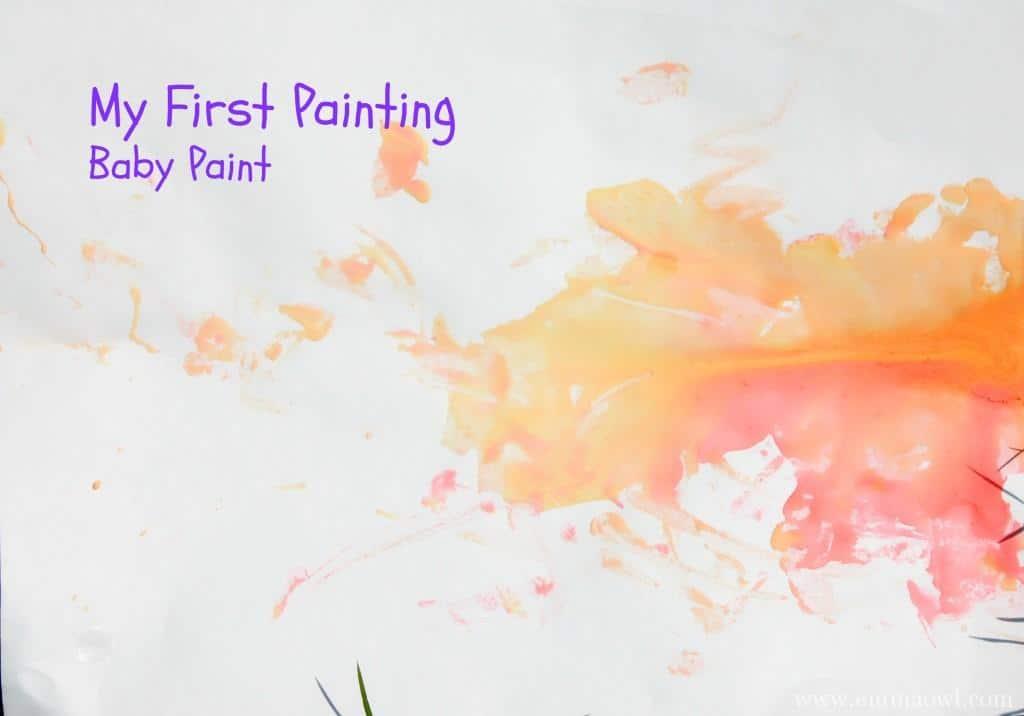
DIY Baby Paint My first painting easy to make


DIY Baby Paint


BABY PAINT RECIPE

2 parts corn starch to 1 part water

Mix well. You may need to mix occasionally while painting as the corn flour can settle a little.

I added the color in 2 ways: The orange I made by adding a tablespoon of Cool Aid and the red I made using the liquid from the beetroot we have in our fridge.

To color this paint, you could also use food coloring, other veggies that have a strong color (carrot juice would make great orange for example) or any edible juice syrup or granules that have a strong color.

Hands may turn a little rainbow – but hey – it comes off!
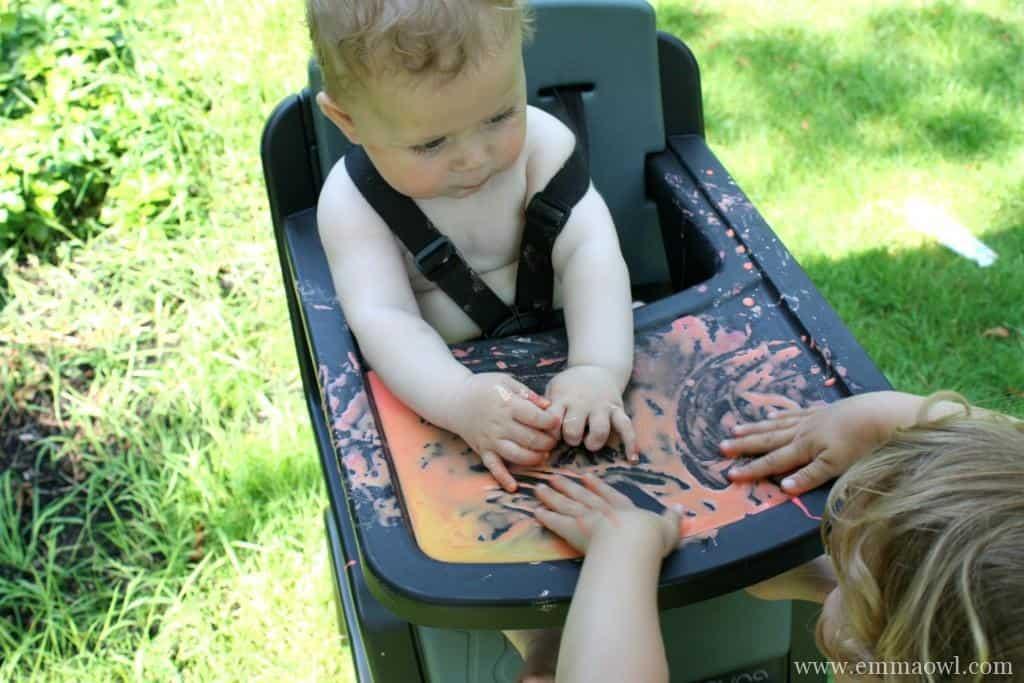
My First Painting - DIY Baby Paint

I was surprised at how long he sat and painted!


How to Have Fun Finger Painting with Your Baby –
With Less Mess!
BY IN MOTHERHOOD

I love art, especially painting. I’ve dappled in acrylics and watercolors, and it’s really therapeutic for me. Because I want to pass that love on to Little Man, I decided to try finger painting this week. And let me tell you, it was fun!

PREPPING FOR FINGER PAINTING WITH YOUR BABY

I promised you a post about finger painting with your baby with less mess, so here you go. Before our painting adventure, I cut open some kitchen-sized plastic trash bags and laid them on the floor to catch any spills. They kind of were all over the place, so I just secured them with some masking tape, and they stayed put just fine. 

I decided to have Little Man sit in his highchair for our fun finger-painting project. It kept a little more contained and the tray helped keep the mess in. Just in case things got a little crazy, I taped another plastic bag around the cushions of the chair back. Super easy!

My hubby changed Little Man into a plain white onesie that I was fine with getting ruined if it came to that. It wasn’t ruined, but I wouldn’t chance it with an outfit you’re overly attached to.

SUPPLIES

Since I’m all about not destroying my house while having fun, I knew I definitely needed some water-soluble finger paints. Clearly, my acrylics were not an option (plus, they are expensive!). So, I did a quick search and found these paints at Walmart for less than $3. They are pretty small, but perfect for what I wanted to do with Little Man. We didn’t use all of them for this one project, so we will definitely have enough for next time.
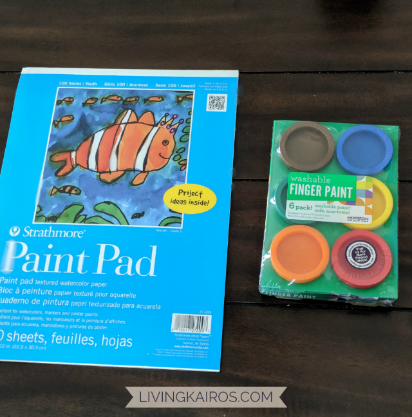
How to Have Fun Finger Painting with Your Baby - With Less Mess!

It’s important to get actual paint paper for finger painting with your baby because it’s heavier than regular printer paper. It holds up with the wet, water-based paints and doesn’t get soggy or tear. I found the pad atWalmart, too, and paid about $4 for twenty sheets. Not bad! I taped down the four corners of the paper onto Little Man’s highchair tray so it wouldn’t move around while he painted.
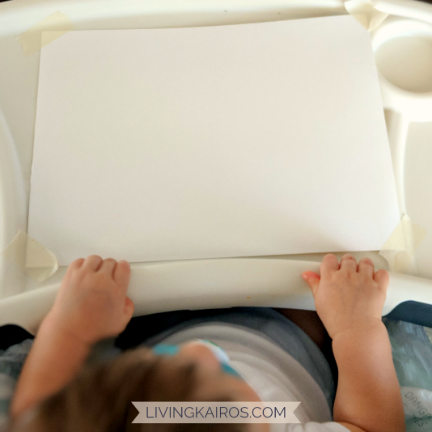
FINGER PAINTING WITH YOUR BABY

Yay! Now all the boring prep work is done and you finally get to let your little one paint! I put a few drops of different colors on Little Man’s paper and let him go crazy. 

He loved it! I made sure he had his pacifier so he didn’t try to put the paint from his fingers into his mouth (we’re at that stage where all the things end up there if we aren’t careful). 
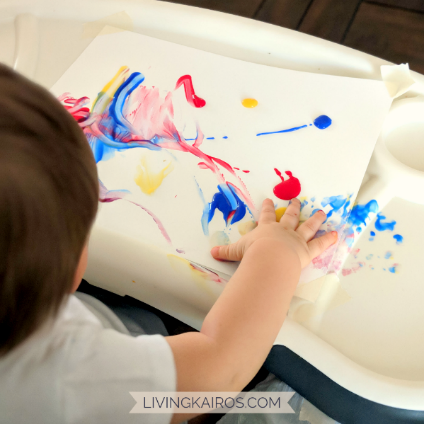
How to Have Fun Finger Painting with Your Baby - With Less Mess!


How to Have Fun Finger Painting with Your Baby - With Less Mess!


Remember that little ones don’t have the longest attention span, so don’t be surprised if this project only lasts a few minutes. We played for about fifteen before Little Man got bored. It was also right before nap time, so he was pretty over it by the end.

CLEAN-UP

Y’all, I’m totally not kidding—the clean-up for this project was ridiculously easy! My hubby rinsed that water-based paint off Little Man’s hands (and face), and I threw away the plastic from his highchair and the floor. Then, I wiped down the tray, and voila! Done and done!


Your masterpiece may look a little blotchy.
But who else has tried painting with their baby????
HINT: Have extra pages of paper ready. Change the paper when you are happy with the way the painting looks and the colors are still clearly defined. Otherwise, the colors become mushed together and it looks like a mud puddle.

When Hope started painting she wanted whatever I was using in the kitchen for paint. So it could be most anything liquid: like Kool aid, Jello, pudding, coffee, whipped cream etc. Her first painting, I would dab paint on and she just slapped the paint. That would create a cool splatter effect. The whole thing took less than a minute. We would wait for it to dry. Then I would help her add “little treasures”. That is the part she loved adding random scraps. I would pre-cut silhouettes of simple, shapes, animals or flowers, Glitter, sequins, stickers, glue stick, paper or fabric scraps, Googly eyes, pipe cleaners, pom poms, ribbons, special buttons, bingo markers etc. anything that we would find in the stores.
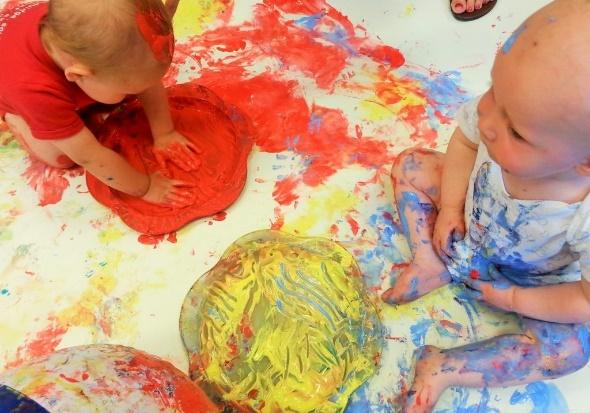
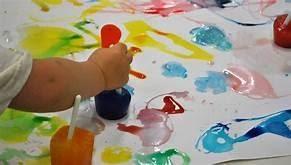
Babies playing with paint

So don’t stop at just painting. Decorate your painting!
A picture containing clipart

Description automatically generated

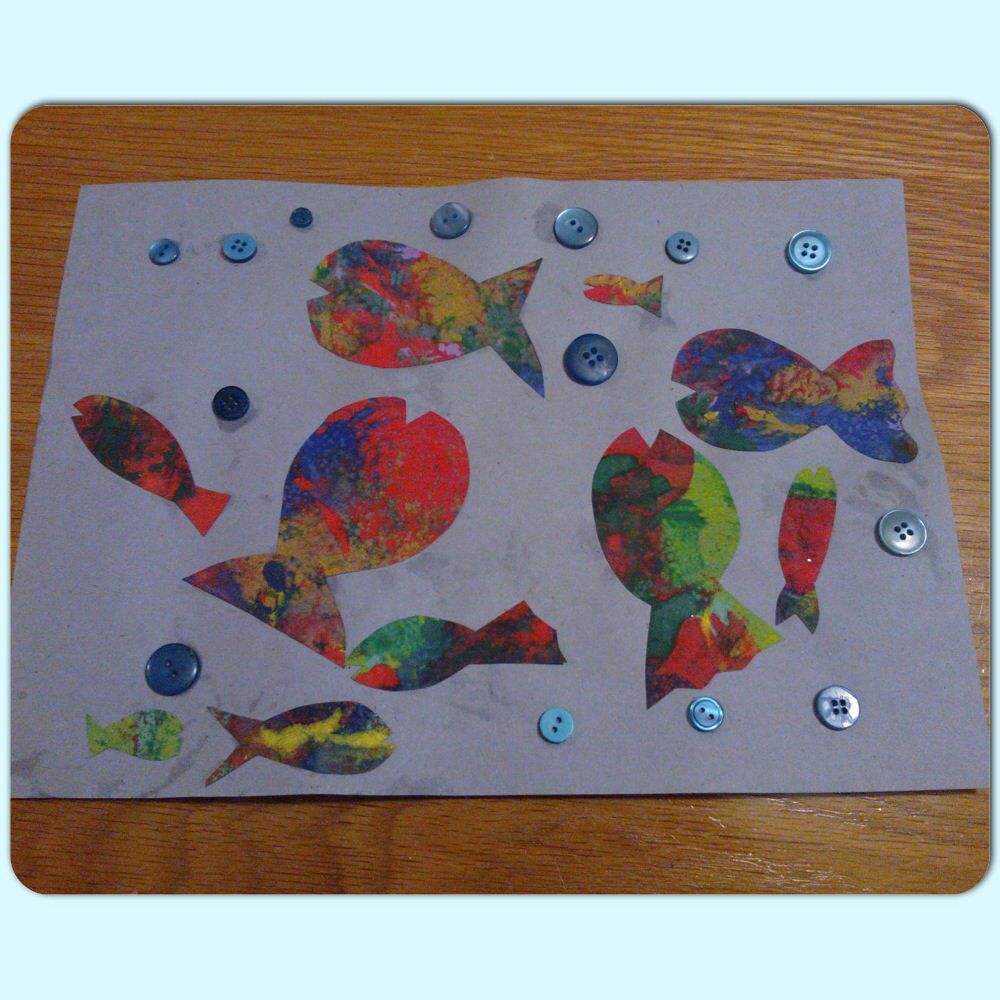
Cutting Hope’s paintings into shapes or having her paint directly on a coloring page always helped her personalize and embellish her paintings. Give it a try!
In order to keep your babies engaged, here is a super cool DIY (Do It Yourself) activity for you and your children.

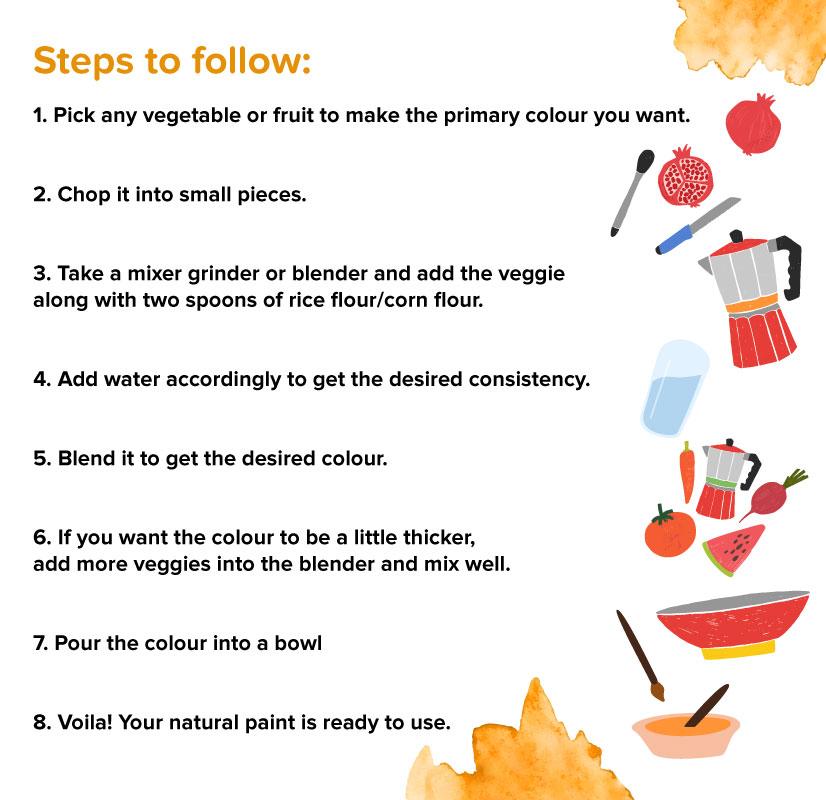
Paints with Natural Colors

When it comes to art and craft, children love to get messy with paints. They are always intrigued by bright and vibrant colors and love to paint their world in different colors. The tough part for the parents comes when their children, in the process of painting, spill paints all over themselves. After all, the paints which you get in stores may not always be safe for children. Hence, the best alternate option is to make your own paints using vegetables and fruits. They are 100% natural and safe for children and also a fun way to spend some quality time with your child.
Diagram, text

Description automatically generated

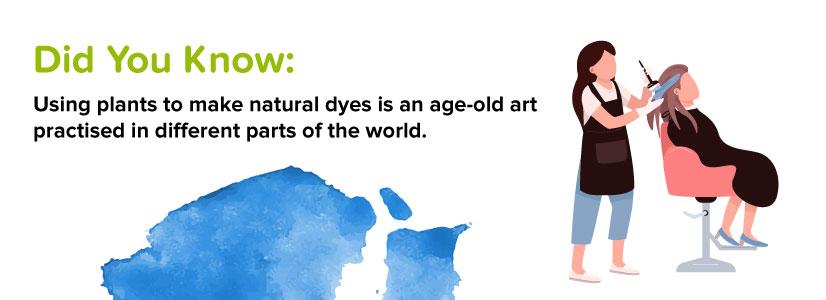
All paints are types of dyes and are made of two things – pigments and binders. The role of the binder is to help the color stay on the material you paint on.

You can create different shades of colors by mixing the three primary colors – red, yellow, and blue! To make these primary colors, you can use the following vegetables or fruits:
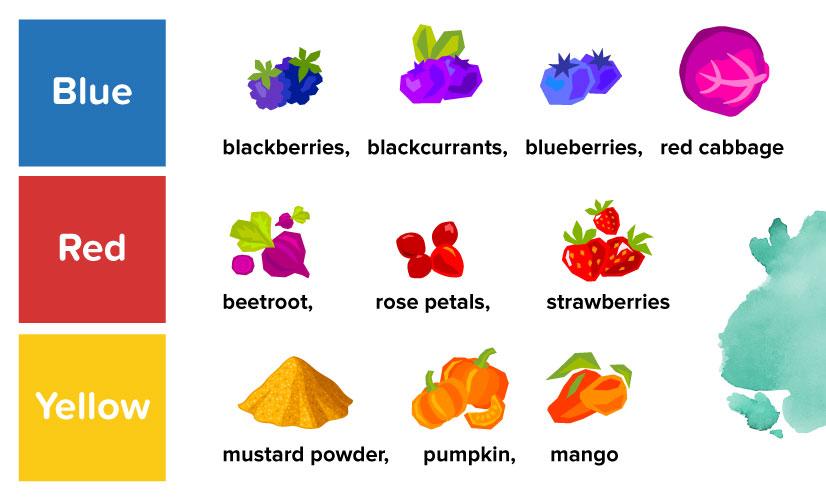
Logo, company name

Description automatically generated

Let’s get started!

Materials needed

  • Vegetables / fruits

  • Rice flour/corn flour (which acts as a binding agent)

  • Water

  • Mixer Grinder or Blender

Diagram

Description automatically generated

You can mix and match these three primary colors to get other colors. For example, mix the red from blended beetroots and yellow from the mangoes to get orange. Red and blue together make violet, and blue and yellow together make green.
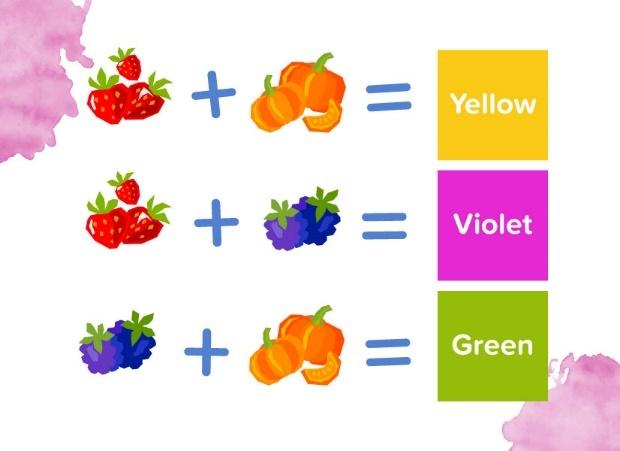
A picture containing diagram

Description automatically generated

Homemade paints are super easy to make and the best part is that they are edible too! Thus they are totally safe for your child to use.
PLUS, it adds some variety to your babies painting experiences to change it up a little.

Painting on PAPER SHAPES 

MATERIALS: 
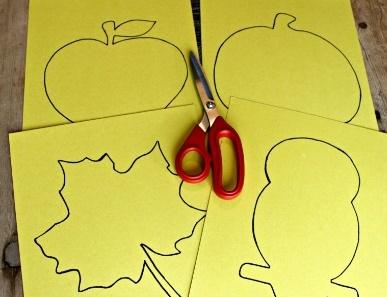
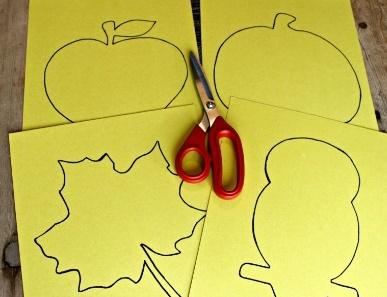
Fall Art Projects: apple leaf pumpkin owl cutouts

Butcher paper or other painting paper, tempera paint, brushes, paint containers. (We add glitter glue.)

PREPARATION: 

Cut desired large shapes from paper. These may be simple geometric shapes, holiday shapes such as pumpkins, Christmas trees, hearts, shamrocks or eggs, or other shapes such as flowers, butterflies or children. 

ACTIVITY: 

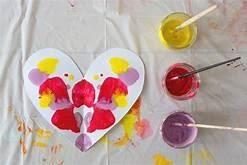
Let the children paint their shapes in any fashion desired. Easels can be used, or painting can be done at tables or even on the floor. One or several colors of paint may be provided with a brush for each color. 

HINTS: 

If you cut out paper children shapes, it might be fun to let each child use one to paint a picture of himself or herself. Display the finished paintings on a wall along with the children's names and photographs. 
A picture containing background pattern

Description automatically generated

Use small peanut butter jars for paint containers. They have wide mouths and don't tip over as easily as plastic containers when inserted in a utility tote. Use the tote when painting at tables or on the floor. 

SENT IN BY: Ruth, Kirkland, WA 

VARIATION: From Cindy, Palatine, IL 

Mix tempera paints in various shades of one color, depending on the theme of the shapes: reds and pinks for Valentine's Day, greens for St. Patrick's Day, etc. 

MASKING TAPE 

MATERIALS: 
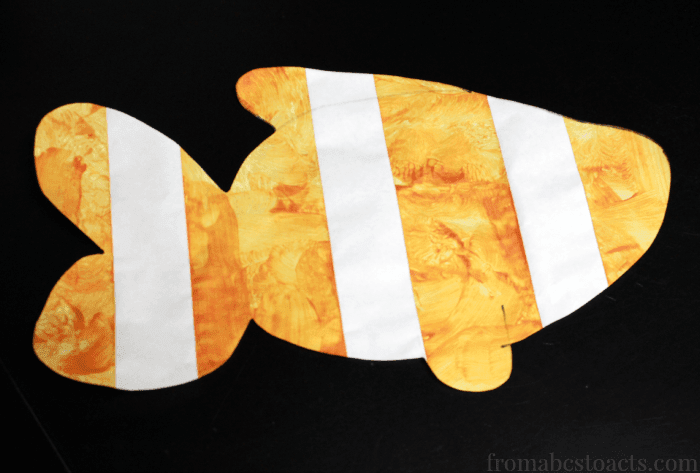
Shiny fingerpaint paper, masking tape, watercolor paints, brushes, small containers of water. 

PREPARATION: 

Put pieces of masking tape on each child's paper in any design. More advanced children may be able to put the tape on their own papers. 

ACTIVITY: 

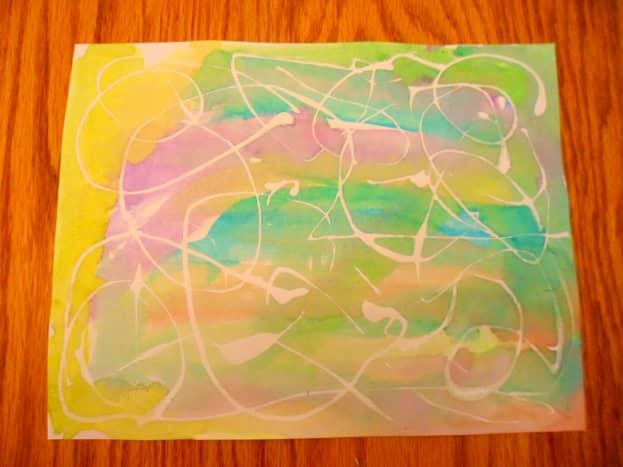
Let the children paint their entire papers with watercolors. When the papers are dry, help the children carefully pull off the tape. The white lines that appear will separate the colors, creating interesting designs. 

SENT IN BY: Nancy, Grand Forks, NO  

Babies love getting creative -- and messy! Explore your babies interest and abilities with these simple and colorful crafts that hone your child's fine-motor skills. Plus, displaying the completed creations around your home will boost your little one's self-esteem. Let small hands take the lead with these activities, but always offer assistance, when necessary…and especially when trying a new technique.

Sparkle Metallic Finger Paint
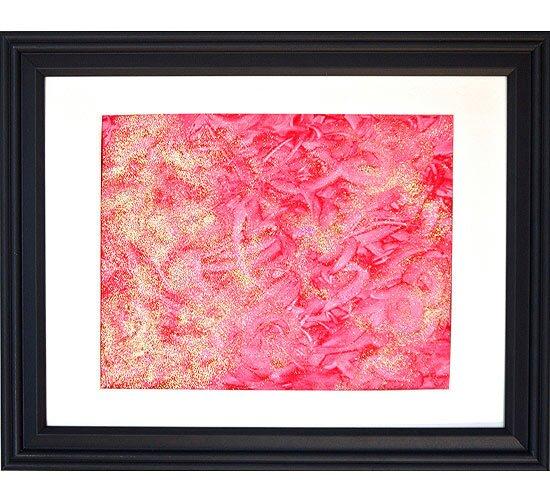
Sparkle finger painting

 CREDIT: SARAH LIPOFF

Squish and swirl finger paint, metallic paint and glitter together to create twinkling artwork.

What You'll Need: 1 sheet white drawing paper, sheet pan, paint (1 color), superfine glitter, small container

Make It: Place the paper on a sheet pan and cover with 1 Tbs. of paint. Have your child use her hands to squiggle and move the paint around, making interesting lines and dots. Add more paint as necessary to cover the paper. Pour a bit of superfine glitter in a small container and help your child pinch and sprinkle the glitter all around the paper to create a glittering effect. Make sure your child doesn't ingest the paint or glitter or get any in her eyes.
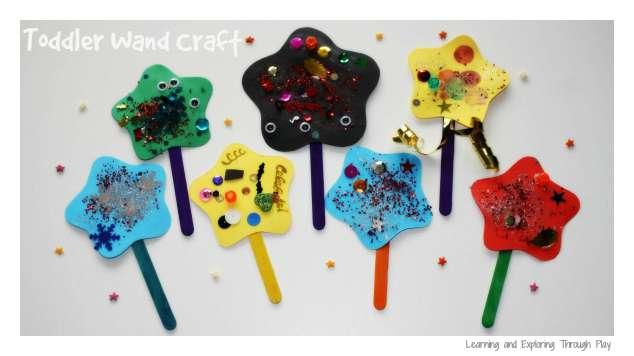
I often worry if I am doing enough arts and crafts with my toddler. I know its important, but things get so busy sometimes life happens and BAM another day with no arts and crafts.

Today it was teaming of rain. And I MEAN teaming! Although I was tempted to have an hour outdoors splashing and splishing in the HUGE puddles forming on the drive, I simply didn't want the hassle today of sludge everywhere. So instead of sludge I opted for GLITTER ( - and LOTS of it!!)

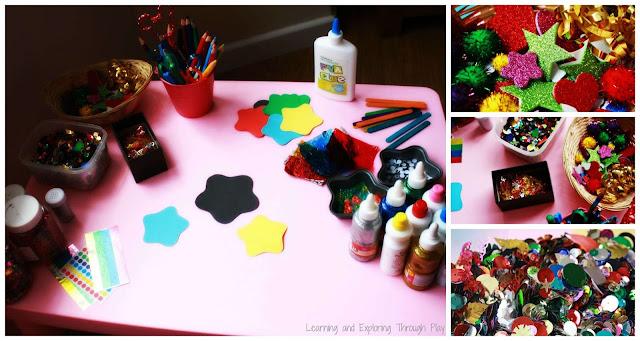
Our Invitation for play looked like this:
A picture containing different, colorful, several

Description automatically generated

So many pretty sparkly items to choose from to decorate the stars! I was a tad JEALOUS actually as I wanted to sit at the table and create myself!! Just like a magpie - attracted to anything shiny!! 

A picture containing text

Description automatically generated


Anyway, Little N spent over an hour doing this. What a BONUS! She was well away! Spreading the glue, putting her hands through the sequins and sticking them down. Sprinkling the glitter was her favourite and the glitter went EVERYWHERE! 

Infact after the craft session she pushed her table out the way and danced around in the glitter on the floor pretending to be Elsa from Frozen!! So amusing!!

Once they had dried, using sellotape we attached craft sticks and made fairy wands! 

Its a great Toddler craft. Whether they love - Ben and Holly, Witches, Wizards, Wallykazam or just simply enjoy creating - its fun, simple and can be used in their play once they've dried!!
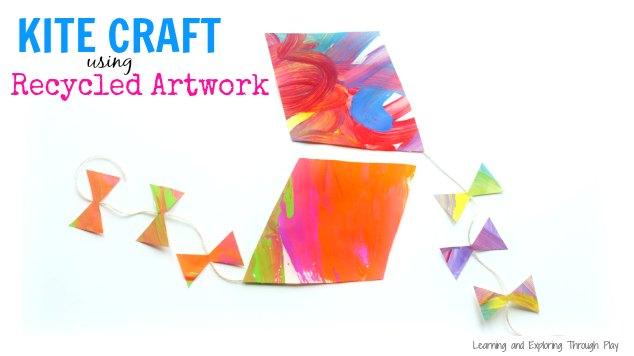

Kite Craft for Kids Recycled Artwork

Kite Craft for Kids Recycled Artwork


It sure is windy at the minute here in the UK and I have been left with a dilemma! My daughter is FOREVER painting at her easel. I have said this before on my blog, but it really has been the best purchase I have made since being a Mommy. She uses it daily. So yay it's great she's using it and enjoying being creative so often..... but I am left with LOTS and LOTS of paintings on the Easel roll paper and the guilt I feel throwing them away is awful! ...
Read more »


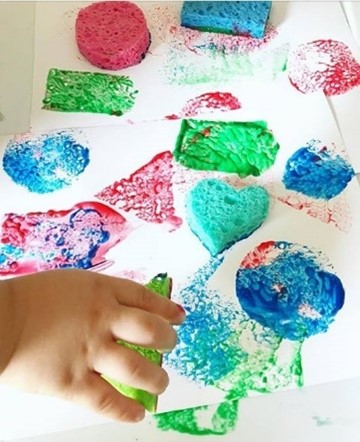
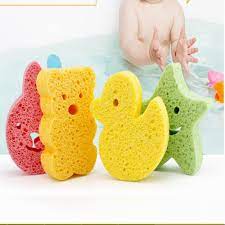
Sponge painting

The dab dab activity as my toddler calls it is his all time favourite.

From dipping sponge into a bowl of paint, to dabbing it on the sheet of drawing paper, he enjoys doing it all and I’m sure every toddler will. Sponge painting activities work best to create abstract images.

Following are the benefits of sponge painting activity

  • Enables self-expression with sponge and paint.

  • Develops eye-hand co- ordination.

  • Sensory experience of exploring paint and paint filled sponges.

sponge painting


sponge painting


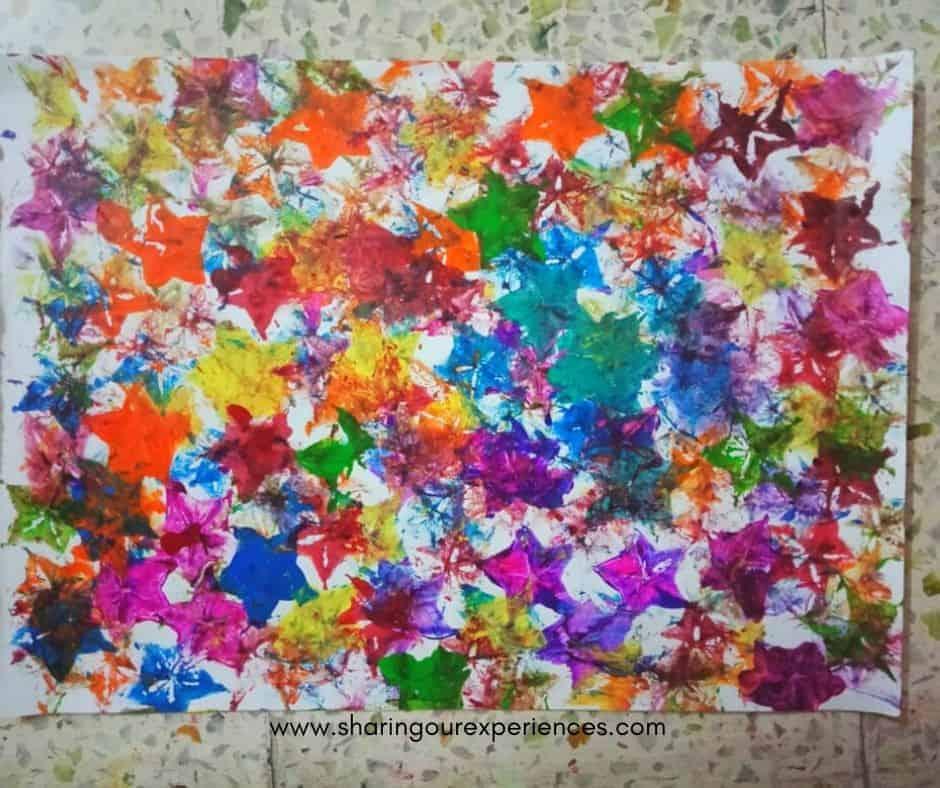
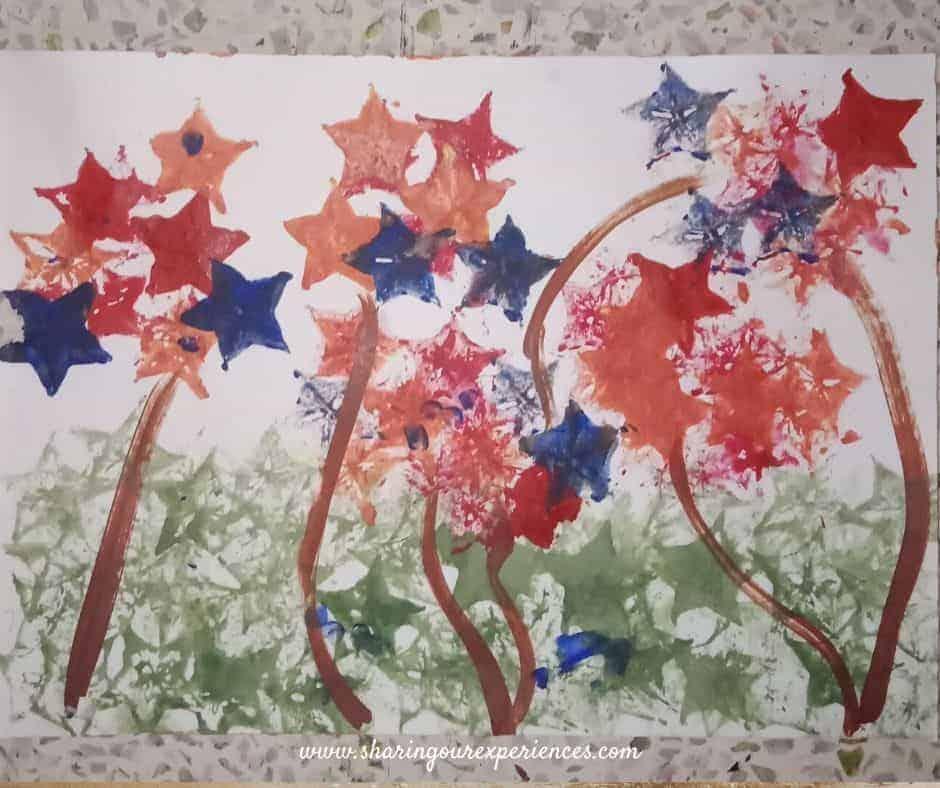
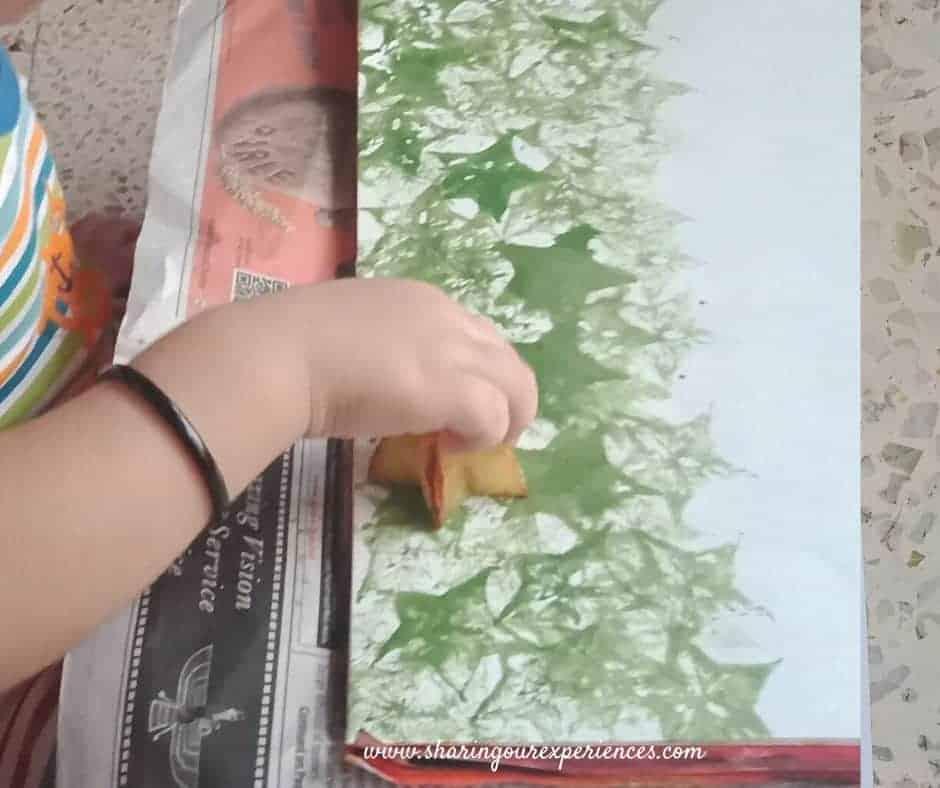
Another fruit we used was the star fruit, we created green grass and red, blue star flowers and a texture of pink, blue, orange and other colorful stars.
Fruit painting


Fruit painting


Toddler Painting Ideas and Activities star fruit painting


Mess Free Tummy Time
Art Projects for Infants

Are you looking for ways to encourage your little one to spend more time [happily] on their belly, or has your babe now figured out how to roll out of Tummy Time? Well, I found the perfect activity to capture their attention and keep them occupied in Tummy Time…. finger painting!! Now, before you start imagining primary colors all over your baby and your floors, let me tell you that the best part about this finger-painting project is that it’s completely mess free. Yeay!

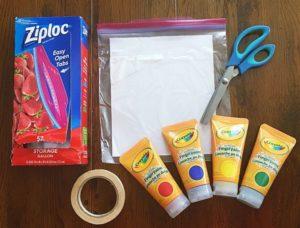
Supplies you’ll need:

A picture containing text

Description automatically generated
  • finger paint

  • plain white paper

  • Ziploc bags

  • scissors

  • masking tape

Step by Step:

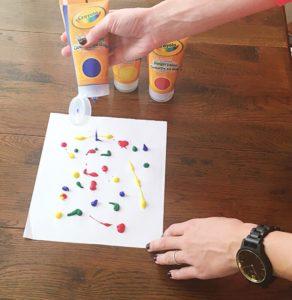
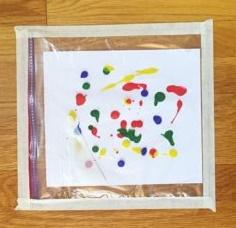
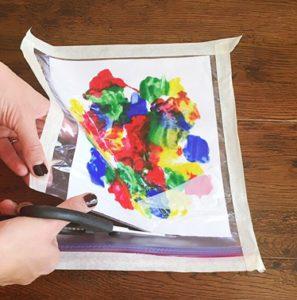
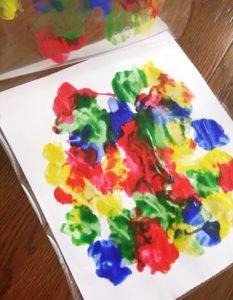
Squirt finger paint at random onto a plain white piece of paper:

A person painting on a table

Description automatically generated with low confidence

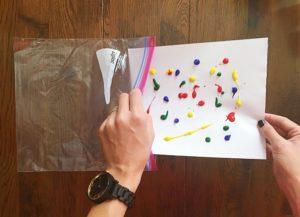
Slide the paper + paint into the Ziploc:

A picture containing text, envelope, picture frame

Description automatically generated

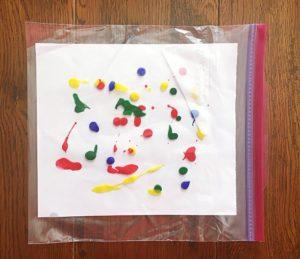
Zip the Ziploc :

A picture containing text, picture frame

Description automatically generated

Tape the Ziploc to the floor:

A picture containing text, picture frame

Description automatically generated

Wider masking tape would be an even better choice.

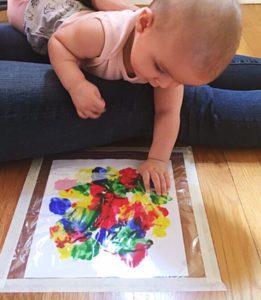
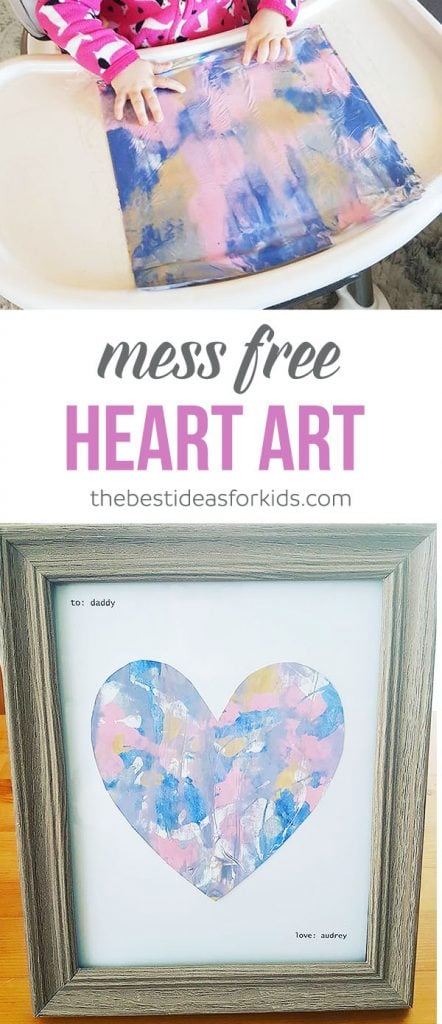
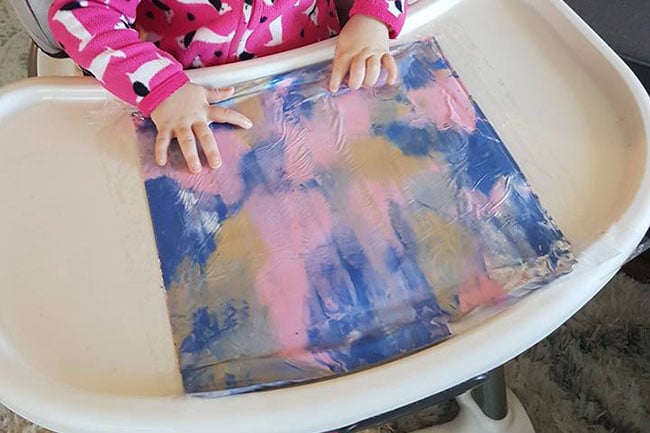
5. Help baby into Tummy Time and allow them to touch, smush and smear the paint however they like:

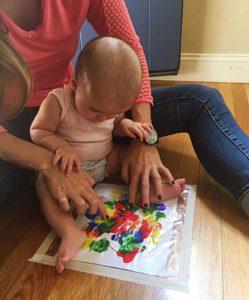
If your baby isn’t yet independently pushing up into tummy time, you can use a Boppy pillow, rolled up towel, or your lap to support their chest and allow their hands to be free for the project.

tummy time

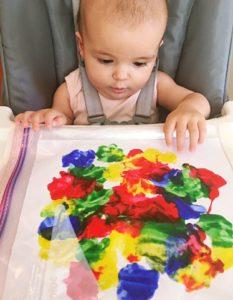
You could also work on the project with a supported sitter, or even using the highchair tray if Tummy Time isn’t working for your little one:

A baby playing with toys

Description automatically generated with low confidence


A baby sitting at a table

Description automatically generated with low confidence
  • Cut around all the edges of the Ziploc:

A picture containing text

Description automatically generated
  • Peel up, take out their masterpiece, and lay it flat to dry:

Voilá – your baby is a regular Picasso!

If you’re feeling adventurous [AKA up for a mess] below are some fun recipes for EDIBLE finger paint you can use for out of the Ziploc fun with your older infants/toddlers.
I’m looking forward to those days!

Rice Cereal based Paint
Gelatin based Paint
Yogurt based Paint

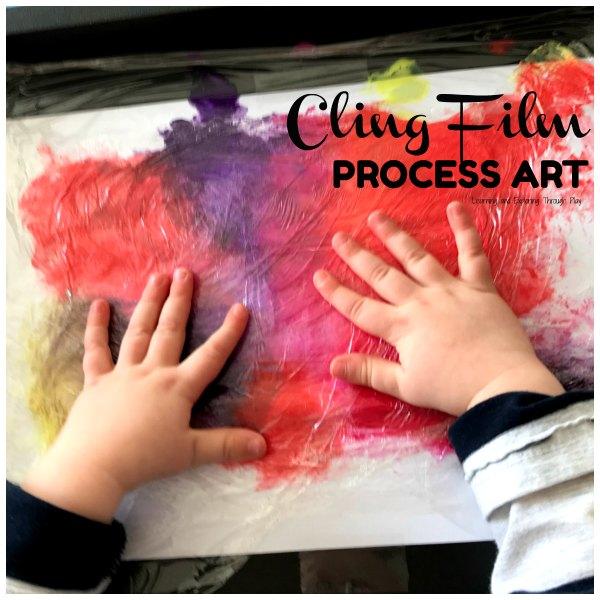
Cling Film Process Art

Easy Cling Film Process Art

If you follow us over on Instagram you will know we are always out and about, doing something together as a family. If we're not out and about we are crafting and getting messy. I'm finding things rather overwhelming at the moment as the twins are more mischievous than ever so I want to start introducing more crafts and activities to hopefully keep them more occupied.  They just seem to be into everything right now that they shouldn't be and its leaving me ready for bed by dinner time!  I find their attention span is very short still ...

Read more »

More Mess-Free Art Activities
for Baby


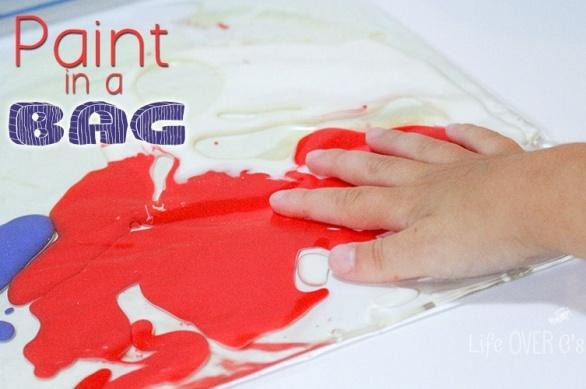
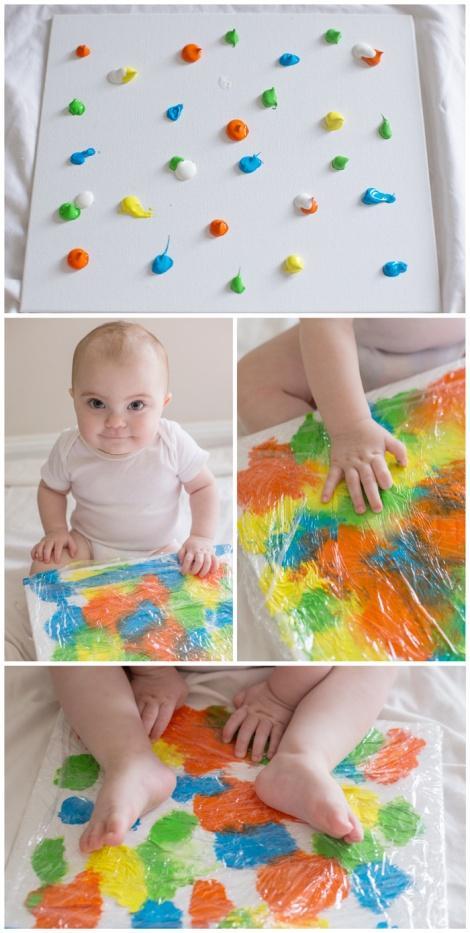
Paint in a Bag  from Pinteresting life

20+ paint recipes & art activities for babies & toddlers.  I love the MESS FREE art ideas!  {Taste safe recipes}

Shake it Up Painting in a Jar  from Sunny Day Family

20+ paint recipes & art activities for babies & toddlers.  I love the MESS FREE art ideas!  {Taste safe recipes}

Mess-Free Tabletop Painting  via The Hippie Housewife

infant on tummy painting.jpg


Paint in a Bag  from Life Over C's
Paint-in-a-bag-feature.jpg
Mess-Free Body Painting
20+ paint recipes & art activities for babies & toddlers.  I love the MESS FREE art ideas!  {Taste safe recipes}
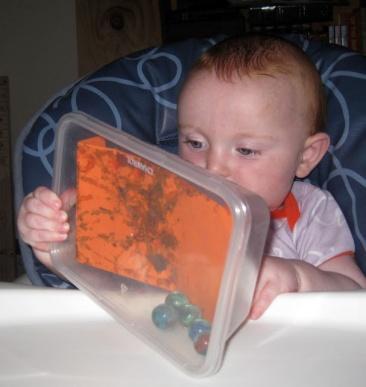
Baby Safe Marble Painting
20+ paint recipes & art activities for babies & toddlers.  I love the MESS FREE art ideas!  {Taste safe recipes}


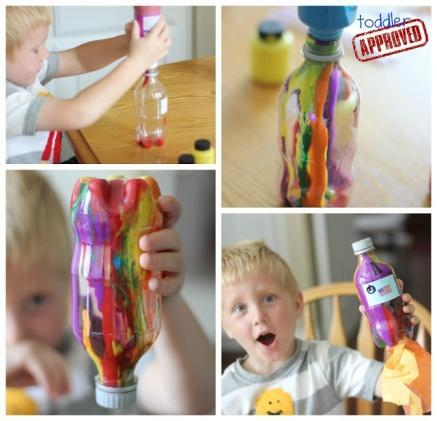
Bottle Painting  via Toddler Approved

20+ paint recipes & art activities for babies & toddlers.  I love the MESS FREE art ideas!  {Taste safe recipes}


Mess-Free Canvas Painting  via Adore Cherish Love

20+ paint recipes & art activities for babies & toddlers.  I love the MESS FREE art ideas!  {Taste safe recipes}


Process Art For Little Ones

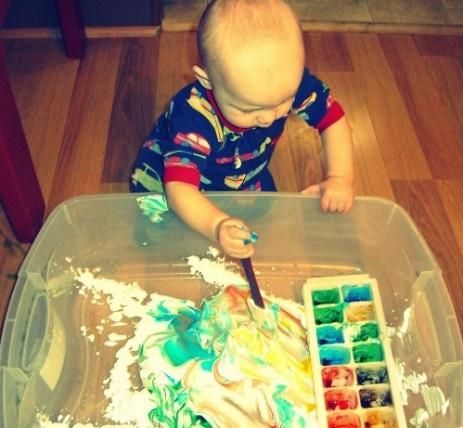
Painting with SHAVING CREAM 


MATERIALS FOR HOLIDAY SHAPES HOLIDAY SHAPES
Fingerpaint paper or white glossy wrapping paper, large aerosol can of shaving cream, powdered tempera or food coloring. 

Image result for paint with shaving cream and glue

PREPARATION: 

Cut the fingerpaint paper or wrapping paper into desired sizes and shapes such as squares, circles, triangles, hearts, eggs or shamrocks. Wet the paper with a sponge and, on each paper, squeeze a puff of shaving cream. Add a dash of tempera paint or food coloring for color desired. 

ACTIVITY

Have the children fingerpaint, first working in the color and then making designs on their papers. This gives the children visual experience with changing color as well as fine motor experience. 

 Let the children fingerpaint with the shaving cream directly on a water-proof surface. Making different shapes is popular, as are making "happy faces" or letters in the children's names. Cleanup is easily accomplished with a wet sponge, and the shaving cream washes off little hands in seconds. 

VARIATION-HAPPY FACES

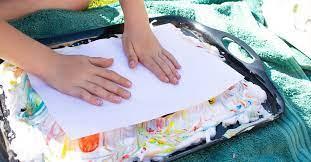
Spray shaving cream on a table surface or on plastic placemats and invite the children to fingerpaint. When each child has finished experimenting, press a paper on top of his or her design. The print will look like a snowy day! 

HINT:

Be sure to dampen the table top before you apply the shaving cream, as it facilitates the movement of fingerpainting. 

A picture containing person

Description automatically generated

VARIATION:
Have the children fingerpaint with shaving cream on clean cookie sheets. Put powdered tempera in old salt shakers and sprinkle paint on the shaving cream. Different colors add interest. 


Painting with FOOD COLORING 


MATERIALS FOR COFFEE FILTERS:

Image result for painting with foodcoloring and coffee filters

One or more coffee filters for each child, food coloring, aluminum, eyedroppers, newspaper, water. 

PREPARATION: 

Mix small amounts of food coloring and water in pans. Cover the table with a thick layer of newspaper . 

ACTIVITY: 

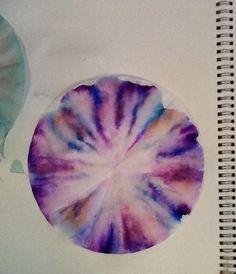
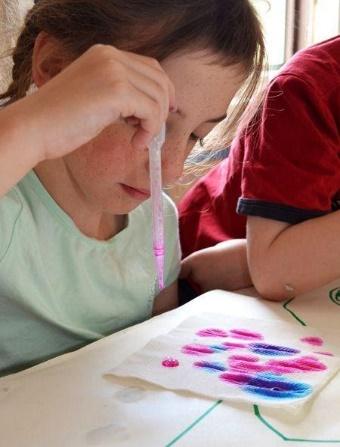
Demonstrate how to use an eyedropper by "squeezing in" and "letting go." Let the children experiment with their eyedroppers by dripping colored water on the newspaper. Then let them explore what happens when they drip the different colors onto their coffee filters. Place filters in newspaper to dry.

HINT: 

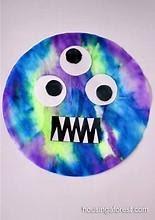
Hang the dried filters as mobiles or make monster art with them

SENT IN BY: Diane

MORE FOOD COLORING

MATERIALS FOR:

See the source image

Dippidy Do:  (Look in Hair Products at Walgreens or CVS)

Fluted coffee filters, food coloring, water, jar lids, newspaper. 

PREPARATION: 

Mix red, yellow and blue food coloring with water and pour small amounts of each color into jar lids. 

ACTIVITY: 

Have the children dip folded filters in and out of the diluted food coloring so that the colors overlap. Unfold filters and dry them on news-paper. 

HINTS: 

Use only a small amount of colored water in each lid and watch to see that children don't leave their filters in until all the liquid is absorbed. Paper towels may also be used, but they tear more easily when wet. 

SENT IN BY:
VARIATION: From Ruth  

Let the children dip the corners and sides of folded paper napkins or white tissue paper into mixtures of food coloring and water. If working with tissue paper, allow it to dry before unfolding, as it tends to rip easily when wet. To dry, hang folded papers by clothespins on a string stretched across a window opening. 

VARIATION: 

The batik-like paper can also be used to make butterfly wings. Have the children pinch their papers together in the middle and slip them into the slots of old-style clothespins . 


Painting with ICE 


See the source image


MATERIALS FOR COOL ART: 

Freezer wrap or fingerpaint paper, ice cube tray, popsicle sticks, powdered tempera, shaker containers, newspaper. 

PREPARATION: 

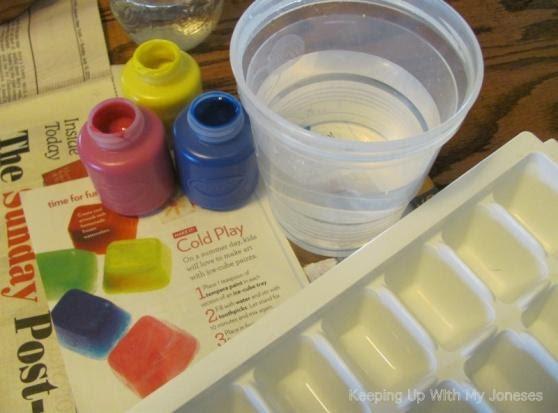
The night before, freeze a tray of ice cubes with a popsicle stick in each cube. (Sticks do not have to be entirely vertical.) Fill shake containers with powdered tempera paint. Cover work table with newspaper. 

ACTIVITY: 

Have your children rub their ice sticks across the shiny freezer wrap or fingerpaint paper. Then let them sprinkle on some dry paint. Children love to watch the ice melt into the color.  

HINT: 

One ice stick can be shared by several children, if desired. 

SENT IN BY: Carolyn 

VARIATION: 

Try doing this activity with icicles if they are available - to you in the winter. Children may need to wear gloves.


Painting with FLOUR 

MATERIALS FOR CHRISTMAS TREES, HEARTS AND EGGS: 

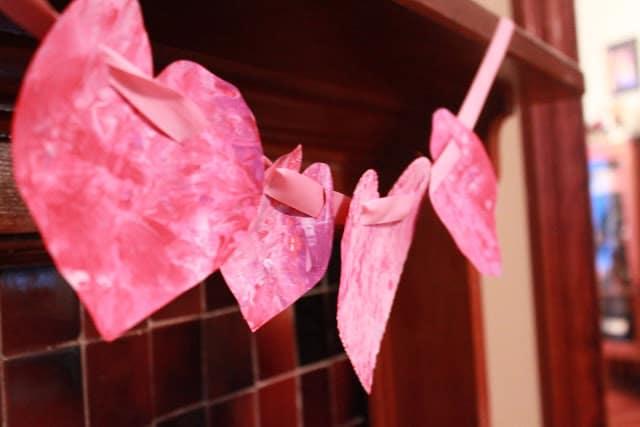
Valentine's Day Art Garland

Construction paper, squeeze bottles, flour, water, food coloring. 

PREPARATION: 

Cut construction paper into shapes such as Christmas trees, Valentine Hearts or Easter eggs. Fill squeeze bottles with a runny mixture of flour and water and add a few drops of food coloring to each bottle. 

ACTIVITY: 

Let your children squeeze the colored flour and water mixture onto their paper shapes to make interesting designs. 

VARIATION:
MIx equal parts of salt and flour together before adding water to make runny mixture. Then let the children squeeze designs on styrofoam Trays or sheets of cardboard.  


Painting with CORNSTARCH 

MATERIALS: 

See the source image

Easel paper, cornstarch, water, liquid tempera, large brushes, paint cups. 

PREPARATION: 

Add cold water to 3/4 cup cornstarch to make a smooth, thick paste. 

Stir in boiling water until mixture is desired consistency. It should be quite thick and nearly clear. Spoon mixture into paint cups and stir 3 or 4 teaspoons of liquid tempera into each cup. 

ACTIVITY: 

Let the children brush this nearly drip less paint on large sheets of easel paper to make designs or pictures. 

VARIATION: 

This mixture can also be used for fingerpainting. Store in refrigerator. 

SENT IN BY: Lanette  


Painting with CHOCOLATE PUDDING 


MATERIALS FOR FINGER FUN: 

Mrs. Karen's Preschool Ideas: Old Mrs. Karen Had a Farm!

Fingerpaint paper, ready-made chocolate pudding, spoons, paint shirts, water, newspaper. 

PREPARATION: 

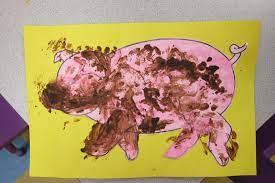
Arrange all the materials on the work table, covering the table with newspaper first, if desired. I had Hope’s piggy cut out. She loved making him muddy.

ACTIVITY: 

Let each child spread out a large spoonful of pudding mixed with some water on his or her paper. Then encourage the children to experiment with finger and hand painting. When they have finished, hang their paintings to dry. 

HINT: 

This is a great activity to use when studying the five senses, especially those of taste, smell and touch. 

SENT IN BY: Jane 

VARIATION-PRINTS: From B. Philadelphia, PA 

Have the children fingerpaint directly on a very clean formica-topped table. Once designs are created, paper can be pressed on top of them to make prints. 


Painting with FINGERS 


MATERIALS F0R SEASONAL SHAPES: 

A picture containing colorful

Description automatically generated

Paint shirts, liquid starch, powdered tempera or food coloring, painting surface such as fingerpaint paper, butcher paper, paper sacks, card-board, formica table top, cookie sheets or oilcloth. 

PREPARATION: 

Put about a tablespoon of liquid starch in the middle of each child's paper. Add about a teaspoon of powdered paint or a few drops of food coloring to the starch. (Keep in mind that food coloring will stain hands.) 

ACTIVITY: 

Have the children use both their hands to mix the color into the starch. Then let them continue using their hands and fingers to create designs and pictures in the paint. Encourage the children to use their hands in many different ways. They can get various effects by pointing fingers down, laying fingers flat, pounding with the side of a clenched fist, pressing hands down with fingers spread out wide and by using finger-tips and knuckles. 

VARIATION: 

Sprinkle some salt or sawdust onto the fingerpaint and let the children mix it into the paint with their hands. This will give added texture to their pictures.  

VARIATION: 

Let the children create additional designs on their finger paintings by using tools such as small pieces of cardboard, old combs, popsicle sticks, cotton swabs or forks. 

VARIATION: 

Instead of using liquid starch, let your children fingerpaint with a paste made out of soap and water or hand lotion with a drop of food color-ing added. 

VARIATION: From CathryN                                                                            

Cut the centers out of pieces of construction paper to make frames for completed finger paintings. Staple frames on top of the paintings. 

VARIATION: From Lanette  

To make seasonal pictures, cut the children's papers into seasonal shapes before or after they make their finger paintings. Some examples could be heart shapes for Valentine's Day, shamrock shapes for St. Patrick's Day and egg shapes for Easter. 


HINTS: From Lanette 

Place a "fence" of masking tape on the paint table to help contain fingerpaint to a desired area. Use a shower curtain or outdoor grass carpet under the table to catch spills. 

VARIATION: From Cynthia

Let the children stand while fingerpainting. This allows for greater freedom of movement and helps with rhythm and coordination. Homemade fingerpaint tends to chip off paper, so let the children paint right on the table top. They will love washing the table afterwards. Smock washing is also a great folJow-up activity. 

HINT: From Cynthia

If you don't have a sink near your work area, keep a bucket of soapy water and towels close by. 

Finger Painting on table top Materials: Paint, Paper Have different colors  of paint laid out and let children mix the paint … | Finger painting,  Painting, Group art

VARIATION: From Nancy, Grand Forks, ND 

Have the children fingerpaint directly on a waterproof surface such as a formica table top. After they have created pictures or designs, let them press paper on top of their paintings to make prints. 

VARIATION: From Suzanne, Pittsburg, PA 

Let the children fingerpaint on plastic cafeteria trays or large styrofoam meat trays. For each child, spoon one or two colors of fingerpaint onto a tray and have him or her fingerpaint a design. When the child has finished, press a piece of paper cut to fit the tray onto the design and lift. Additional paint can be added to the tray for the next child. 


Painting with PINE BRANCHES
 

Painting with Pine Needles

MATERIALS FOR PINE PATTERNS: 

Pine branches, pinecones, easel paper, paint. 

PREPARATION: 

Pour paint into shallow containers. 

ACTIVITY: 

Have the children use the pine branches and pinecones to paint at the easel. They'll enjoy seeing the different types of patterns these materials make. 

VARIATION: 

This activity can also be done with other kinds of small tree branches, ferns, feathers and grasses such as hay or wheat. 

SENT IN BY: Mary  

VARIATION: From Jane 

Let the children use 3-inch to 4-inch branches of various evergreens to dab paint on paper. After they have finished, staple each child's branch on his or her painting. When doing this activity, discuss the smell, texture and color of different evergreens.
MATERIALS: 

Several stalks of Queen Anne's Lace, red, yellow and white paint, dark paper. 

PREPARATION: 

Pour paint into shallow containers.
 

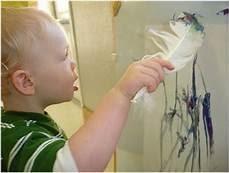
Painting with FEATHERS 


MATERIALS: TURKEYS
Single feather or feathers clipped in a Clothespins or feather dusters, tan OR brown construction paper, paint, newspaper. 

A picture containing indoor

Description automatically generated

PREPARATION: 

Cut a turkey shape out of construction paper for each child. 

ACTIVITY: 

Have the children place their turkey shapes on pieces of newspaper. Then let them dip their feathers in paint and brush it on their turkey bodies. 

VARIATION: 

If you're using single feathers, let each child stick several of them on his or her painted turkey shape. The result will be a painting and a collage feathers, as well. 

SENT IN BY: Nancy 


Painting with A SPOON 


MATERIALS FOR SALTY SOUNDS: 

LIQUID tempera paint, salt, spoons, brown paper bags or fingerpaint paint containers. 

PREPARATION: 

Pour paint into containers and mix with salt.  

ACTIVITY: 

Put a spoonful of paint on each child's paper. Then let the child push -Paint around with the spoon. Add more paint as needed. The paint & salt mixture provides a texture and sound that children like.


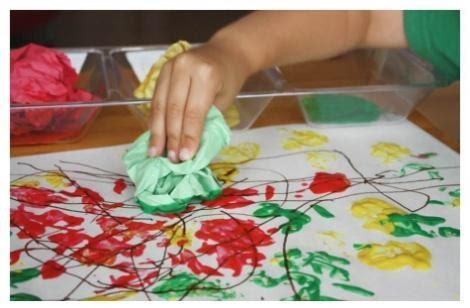
CRUMPLED PAPER 

 MATERIALS FOR SPRING THINGS: 

Construction paper or other heavy paper, newspaper, various colors of tempra paint, paint pans. 

A person painting on a table

Description automatically generated with low confidence

PREPARA TI 0 N: 

Mix tempera paint into shallow pans. Crumple newspaper. 

ACTIVITY: 

Have the children dip crumpled newspaper into paint and dab it onto construction paper. Let the paper dry and cut it into egg shapes. 

VARIATI0N: 

You may want to cut out the egg shapes before the children paint them. This is also a good activity for making kite shapes or other spring items

SENT IN BY: Sally J. Horton, Waukegan, IL 


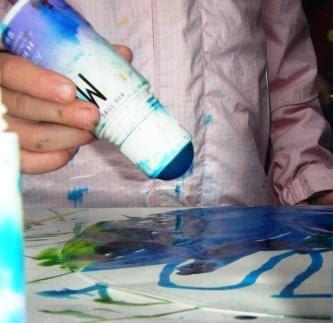
Painting with ROLL-ON DEODORANT BOTTLES 

MATERIALS FOR MAGIC MARKERS: 

A picture containing person

Description automatically generated

Empty glass roll-on deodorant bottles, one for each color desired, tempera paint, newsprint, construction paper or manila paper. 

PREPARATION: 

Remove rollers from bottles and clean both rollers and bottles thoroughly. Fill bottles with tempera paint and replace rollers. 

ACTIVITY: 

Let the children use the roller bottles to draw pictures or designs on their papers. 

SENT IN BY: Ruth, Kirkland, W A 

VARIATION: From Betty, Waco, TX Encourage the use of several different color combinations in the children's drawings or designs. 

VARIATION: From Rosemary, Pleasant Ridge, MI 

Have the children use the deodorant bottles like magic markers. It's interesting to use both large and small roller heads to create designs. 

SIMILAR IDEAS SUBMITTED BY: Cathryn, St. Charles, IL 


 Painting with SPRAY BOTTLES 


MATERIALS: 

A group of bottles with liquid in them

Description automatically generated with medium confidence

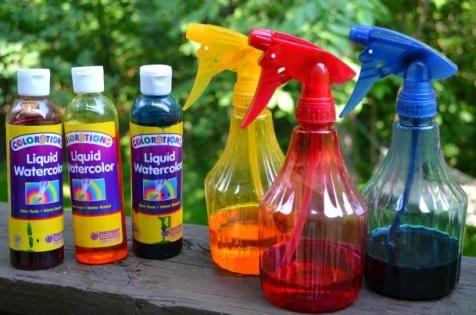
Empty spray bottles, thinned tempera paint, large pieces of paper. 

PREPARATION: 

Fill spray bottles with paint. 

ACTIVITY: 

Have the children to create designs by "spray painting" on their papers wi:h the spray paint bottles. 

SENT IN BY: Cathryn 


SQUEEZE BOTTLES 


MATERIALS FOR BLOT PRINTS OR MURAL: 

Small squeeze bottles, tempera paints of various colors, construction paper. 

PREPARATION: 

Mix tempera paints to a thick consistency. Pour into squeeze bottles. Cut paper into a variety of shapes and sizes. 

ACTIVITY: 

Let the children squeeze paint on their papers to create designs. 

SENT IN BY: Betty

VARIATION: From Cynthia

Squirt some paint inside pieces of folded paper. Have the children press outward with their hands on top of their papers. Then let them unfold their papers to reveal the designs they created. 

VARIATION: From B

Invite the children to create a mural by squirting paint from tempera-filled detergent bottles on a large sheet of butcher paper placed over newspapers or a drop cloth.


Painting with Q- TIPS 


MATERIALS FOR PAINTING TIPS: 

A picture containing person, businesscard

Description automatically generated

Q- Tips, tempera paint, construction paper, egg cartons. 

PREPARATION: 

Assemble supplies. Cut egg cartons in thirds to make four-part paint containers. Pour small amounts of paint into each container. 

ACTIVITY: 

Have the children dip Q- Tips into paint and use them like brushes to create designs on their papers ... 

VARIATION: 

Use dried wide markers in place of Q- Tips. Let the children dip them in paint and use them to draw or write. 

SENT IN BY: Barbara  

HINT: From Gina, MA 

To make cleanup easy and fun, fill a dish basin with a small amount of soapy warm water and place it at children's level. Let children wash their hands, then supply them with paper towels to dry their hands.


SCOURING PADS 


MATERIALS: 

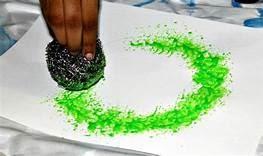
Large sheets of paper, plastic scouring pads, paint pans, liquid  tempera paint, paper towels. 

PREPARATION: 

Place folded paper towels in paint pans and pour on liquid tempera to make paint pads. 

ACTIVITY: 

Let the children dip the plastic scouring pads into liquid tempera and use them to "paint" on their papers. Stroking motions or up and down movements create interesting effects. This is fun to do with two colors of paint. 


Painting with COTTON BALLS 


MATERALS DRY TEMPRA: 

Cotton Ball Painting: Fun Craft for Toddlers and Preschoolers •

Construction paper, cotton balls, brushes, various colorsof powdered -tempera in margarine containers, hair spray. 

ACTIVITY: 

Let the children "paint" with the powdered tempera using cotton balls and brushes to smear the dry paint  

HINT: 

Q-Tips may also be used for "painting," but they require somewhat more refined small motor skills. 

SENT IN BY: Cindy, Palatine, IL

HINT: From Nancy, Grand Forks, ND  
Use meat trays or paper plates to hold the powdered paint. If using several colors, the trays can be passed around the table. If the room is small, or has poor ventilation, spray the paintings outside. 


COTTONBALLS 


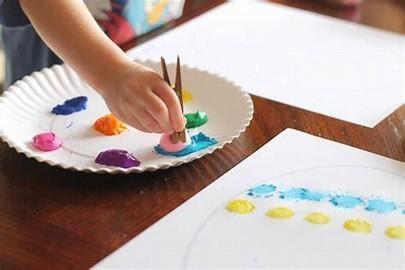
MATERIALS FOR CLOTHES PIN HANDLES: 

Image result for painting with clothes pins and cotton balls

Spring-type clothespins, cotton balls, paint, small containers, paper, tape. 

PREPARATION: 

Pour paint into small containers. Tape paper to table. Clip a cotton ball to the end of each clothespin.

ACTIVITY: 

Using the clothespins as handles, let the children dip the cotton balls in-to paint and then spread it on their papers. 

HINT: 

When the cotton balls start to get stringy from too much paint, replace them with fresh ones. 

SENT IN BY: Gina Masci, Arlington, MA 


Painting with A SCREEN 


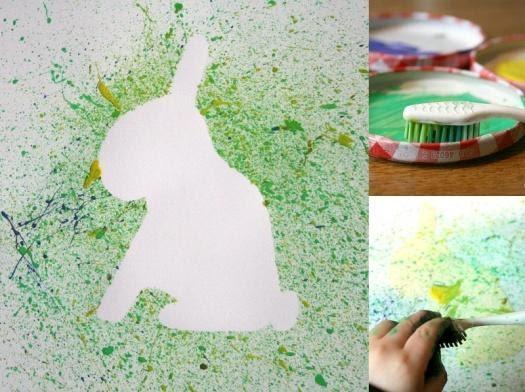
MATERIALS FOR SPLATTER PAINTING: 

Colored construction paper, tempera paint, paint containers, old toothbrushes, wire screen attached to a cardboard box frame (see directions below), materials for making stencils. 

PREPARATION: 

For stencils, gather things such as leaves or flowers or cut paper shapes to fit themes such as animals, fruits or holidays. The shapes can be us-ed many times, so only one or two sets are needed. Pour small amounts of tempera into containers and insert old toothbrushes. 

ACTIVITY

Have each child arrange stencil materials on a sheet of paper and place the paper under the framed screen. Then let the child rub a toothbrush dipped in paint back and forth over the screen. When enough paint has been spattered on the paper, remove the stencil materials and allow the painting to dry. 

HINT: 

Contrasting colors of paint and paper work best. White paint on dark colored construction paper, for example, is quite effective. 

MAKING THE FRAME: 

The time spent making a framed screen for spatter painting could be well worth it. It creates far less mess than using wooden sticks, it's easier for children to use independently and it will last for several years. 
Purchase a piece of screen about 9"x12". The metal screen works better than plastic. Choose a sturdy cardboard box that has a bottom at least as large as the piece of screen and glue the flaps in the bottom together. Using a utility knife, remove the top flaps and cut around the sides of the box about 4" to 8" from the bottom. On one side, cut down another 2" or 3" to allow paper to be inserted without lifting frame. Cut a hole in the bottom of the box, at least 2" smaller on all sides than the piece of screen. Place the screen over the hole and use a staple gun to secure it to the box where it overlaps. To prevent children from getting scratched by the wire screen, staple an additional cardboard frame over the overlapping edges. 

SENT IN BY: Ruth, Kirkland, WA 


Painting with A SCREEN
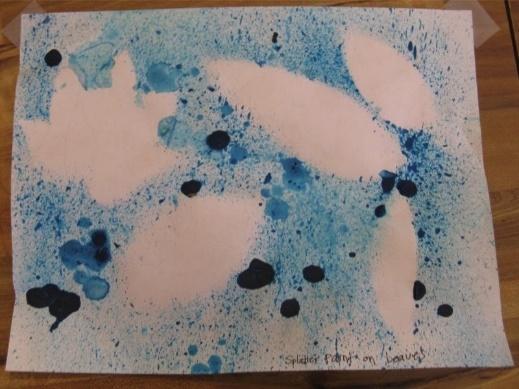
MATERIALS FOR LEAF PRINTS: 

Preschool Is Fun Planning Activities: Leaf Splatter Painting

Shoe box, tempera paint, shallow paint dish, toothbrush, construction paper, piece of wire screen, newspaper, leaves or other materials to use stencils. 

PREPARATION: 

Cut construction paper into pieces slightly smaller than the shoe box. pour paint into shallow dish. Spread newspaper on work table and lace shoe box on top of it. 

ACTIVITY: 

For each child, place a piece of construction paper in the bottom of the shoe box and put a leaf on top of the paper. Place the screen on top of the box and mold it around the box edges, if necessary. Let the 

child dip the toothbrush in paint and rub it across the top of the screen until desired spattering effect is achieved. Remove the screen and take Jut the leaf along with the child's painting. Allow the painting to dry onflat surface.


TONGUE DEPRESSORS 


MATERIALS: 

Cookie cutters or other simple forms, construction paper, styrofoam meat trays, sharp cutting knife, toothbrushes, tempera paint, tongue depressors. 
PREPARATION: 

Hold cookie cutters or other forms on styrofoam trays and cut around them with a sharp knife to make stencils. 
ACTIVITY: 

Have the children place styrofoam stencils on construction paper. Then let them dip toothbrushes in paint and rub tongue depressors across the toothbrushes to spatter paint onto their papers. Use Christmas or Thanksgiving cookie cutters for holiday pictures. 
SENT IN BY: Barbara


Painting with MARBLES 


MATERIALS FOR DESIGNS: 

Pin on Fun with the Kiddos

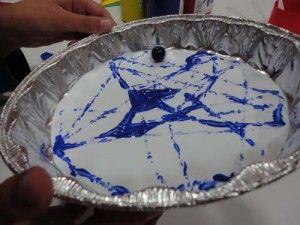
Aluminum pie tins, one or two marbles per child, one or two colors of fairly thick paint, shallow paint containers, paper, smocks. 

PREPARATION: 

Cut paper circles to fit in the bottoms of the pie tins. Pour paint in con-tainers and add marbles. 

ACTIVITY: 

Have the children place paper circles in their pie tins. Then put one or two paint-covered marbles in each tin. Let the children roll the marbles back and forth. The marbles will leave a trail of color, crisscrossing over and over again. This is a great eye-hand activity. 

SENT IN BY: Melode, Grand Junction, CO 

VARIATION: From Myrna, Manassas, VA 

Use rectangular paper placed in the bottom of shallow cardboard boxes for marble painting. Small plastic balls can be used in place of the marbles. 

VARIATION: From Jane, So. St. Paul, MN 

Cut construction paper into kite, flower or butterfly shapes and use them for marble painting. 

VARIATION: From Nancy, Grand Forks, ND 

Cut down half-gallon milk cartons to use as paper holders. Let the children marble paint on precut seasonal OR holiday shapes such as pumpkins, bells, mittens and hearts . 

VARIATION: From Connie, Hardy, NE 

Instead of putting marbles in the paint, put one or two teaspoons of tempera on each paper and let the children roll the marbles back and forth over the paint. 


Painting on SNOW 


MATERIALS FOR COLOR SCAPES:
Watercolors, tempera paint or food coloring mixed with water, brushes, small containers, snow. 

See the source image

PREPARATION: 

Pour paint into containers suitable for use outdoors . 

ACTIVITY: 

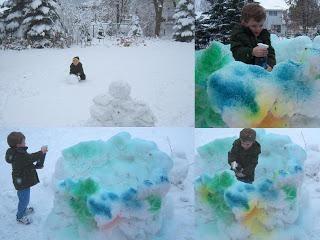
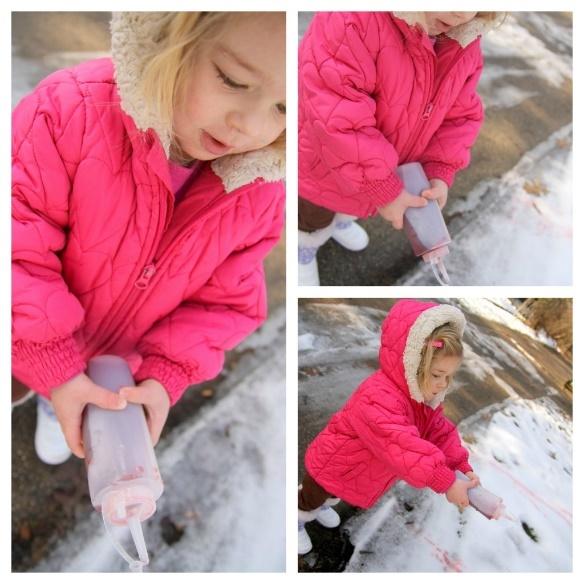
Have the children outside when the snow is a few inches deep. Allow them to freely explore the effects of paint on snow, using both small and large brushes. The colors will spread as the paint touches the snow. Encourage creating splashed colors with wide, sweeping movements or making snow sculptures and painting them. The snow will hold the paint cans and brushes firmly in place, so you won't need to worry about upsets. 

SENT IN BY: Jan G. INSPIRIATION: From Marjorie D., Stony Brook, NY 

Fill empty plastic squeeze bottles with water and different colors of food coloring. Let the children squirt the colors onto the snow. Watch the excitement as the snow becomes a rainbow of colors! The next day, examine the snow to observe the melting process.


Painting on PAPER SHAPES 

MATERIALS: 

Fall Art Projects: apple leaf pumpkin owl cutouts

Butcher paper or other painting paper, tempera paint, brushes, paint containers. (We add glitter glue.)

PREPARATION: 

Cut desired large shapes from paper. These may be simple geometric shapes, holiday shapes such as pumpkins, Christmas trees, hearts, shamrocks or eggs, or other shapes such as flowers, butterflies or children. 

ACTIVITY: 

Let the children paint their shapes in any fashion desired. Easels can be used, or painting can be done at tables or even on the floor. One or several colors of paint may be provided with a brush for each color. 

HINTS: 

If you cut out paper children shapes, it might be fun to let each child use one to paint a picture of himself or herself. Display the finished paintings on a wall along with the children's names and photographs. 

A picture containing background pattern

Description automatically generated

Use small peanut butter jars for paint containers. They have wide mouths and don't tip over as easily as plastic containers when inserted in a utility tote. Use the tote when painting at tables or on the floor. 

SENT IN BY: Ruth, Kirkland, WA 

VARIATION: From Cindy, Palatine, IL 

Mix tempera paints in various shades of one color, depending on the theme of the shapes: reds and pinks for Valentine's Day, greens for St. Patrick's Day, etc. 


MASKING TAPE 

MATERIALS: 

Shiny fingerpaint paper, masking tape, watercolor paints, brushes, small containers of water. 

PREPARATION: 

Put pieces of masking tape on each child's paper in any design. More advanced children may be able to put the tape on their own papers. 

ACTIVITY: 

Let the children paint their entire papers with watercolors. When the papers are dry, help the children carefully pull off the tape. The white lines that appear will separate the colors, creating interesting designs. 

SENT IN BY: Nancy, Grand Forks, NO  


Painting on NEWSPAPER 

A picture containing text

Description automatically generated

MATERIALS: 

Newspaper, tempera paint, brushes, paint containers. 

PREPARATION: 

Pour paint into containers. Place newspaper in desired painting areas. 

ACTIVITY: 

Let the children paint pictures or designs on newspaper. Try a variety of painting areas around the room: easels, tables, walls and floor. 

SENT IN BY: Cynthia, Danbury, CT 

MATERIALS FOR SHINY PICTURES: 

Oaktag or light cardboard, tempera paint, white liquid glue, brushes, paint containers, aluminum foil, newspaper. 

PREPARATION: 

Cover table with newspaper. Cut large rectangles out of oaktag and cover with aluminum foil. In paint containers, mix paint with glue to a thick consistency. Stir well. 

ACTIVITY: 

Have the children paint designs on the aluminum foil with colored glue. The effect is nice if areas are left unpainted, since the foil reflects the paint. 

HINTS: 

When finished, make frames for the paintings. This is a nice activity for Christmas because of the shiny effect. Older children can etch designs in the glue with popsicle sticks, either freehand or using stencils. 

SENT IN BY: Jane, Sarasota, FL
OUR VARIATIONS-When dry cut into 1 ½ inch strips- fold so painted side can be seen on one side and weave into basket like above or into a simple
Make a pattern for folding paintings into these type of butterflys.


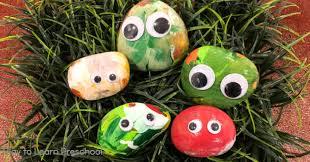
Painting on ROCKS 

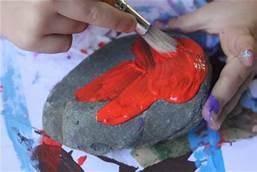
MATERIALS:
Rocks, paint, small containers, brushes. 

A picture containing person

Description automatically generated

PREPARATI0N: 

Before doing the activity, take your children on a walk to gather rocks that can be painted. Pour paint into small containers. 

ACTIVITY: 

Have children paint the special rocks that they found any way they 

HINT: 

As a separate activity, have the children wash their rocks before they 

 them. Toothbrushes work very well for this. 


PINECONE CHRISTMAS TREES 

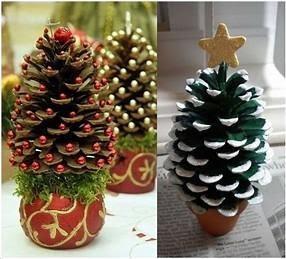
MATERIALS: 

Image result for PINECONE TREES

One large pinecone for each child, green and white tempera paint, small sponges, glitter, small Christmas balls (optional), newspaper. 

PREPARATION: 

Pour tempera into shallow dishes. Cover tables with newspaper. 

ACTIVITY: 

Have the children dip sponges into green and white tempera and apply paint all over their pinecones to simulate snow-covered evergreen trees. While paint is still wet, glitter may be sprinkled on, or small Christmas balls may be added. 

HINT: 

Children who do not like messy hands can paint with sponges that are clipped to clothespins. 

SENT IN BY: Kathy Tustin, CA  


Painting on PAPER PLATES 

A picture containing text

Description automatically generated

MATERIALS FOR SUNS: 

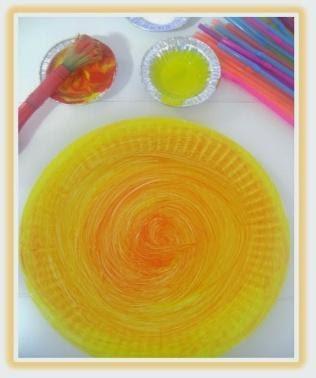
Paper plates, yellow paint, brushes, yellow crepe paper or tissue paper, glue. 

PREPARATION: 

Cut crepe or tissue paper into small rectangles, approximately 1" x 2". 

ACTIVITY: 

Have the children paint their paper plates yellow to make "suns." While the plates are still wet, let the children press paper rectangles on the paint. They should stick, but if the paint dries before the children have finished, let them use glue. Encourage the children to not only stick rectangles in the middle of their plates, but also over the rims to resemble sun rays. 

VARIATION: sunflowers

Have your children glue sunflower seeds on the middle of their plates 

to turn their suns into sunflowers. Attach them to green paper stems to create a sunflower "garden." 

VARIATION: happy faces

After your children have painted their paper plates yellow and the paint has been allowed to dry, have the children draw lines or paste precut shapes on their plates to make "happy faces." 

MATERIALS: 

Large cardboard cartons, poster paint, 2-inch brushes, newspaper. 


Painting on GLUE 

MATERIALS: 

Image result for PAINTING ON GLUE

Construction paper, glue in squeeze bottles, tempera paint, brushes. 

PREPARATION: 

Twenty-four hours ahead of time, squeeze glue on a paper for each pattern of your choice. Do not rub the glue. Just allow it to dry a5 it was squeezed on the paper. 

ACTIVITY: 

Hand out the papers and let your children paint over the glue patterns. Glue provides a new, interesting texture for them to work with

VARIATION: 

Depending upon the ability of the children, you might want to let them squeeze the glue on their own papers. 

SENT IN BY: Kathleen, Griffith, IN 

A beautiful abstract painting with a variety of colors, shapes, and lines.

VARIATION: From Mary, Lansing, MI 

Have your children dribble rubber cement on their papers. Allowthe glue to dry about half an hour. Next, have them paint over the glue. When the paint has dried, let the artist peel off the rubber cement, revealing the pictures or 

patterns they have made.


Painting on CRAYON 

A picture containing gear

Description automatically generated

MATERIALS FOR SEASONAL SURPRISES: 

Paper, black paint, white crayons. 

PREPARATION: 

Thin the black paint. Using a white crayon, draw a "mystery picture" on paper for each child. Suggestions: Fall - ghosts; Winter - stars, moons, hearts; Spring - clouds; Summer - fish. Older children may be able to draw their own pictures. 

ACTIVITY: 

Let your children paint over their "mystery pictures" with the thinned black paint. 


Painting on STENCILS 


MATERIALS: 

A picture containing text, envelope

Description automatically generated

Cardboard or oaktag, tempera paint, brushes or sponges, construction paper, masking tape, shallow dishes, newspaper. 

PREPARATION: 

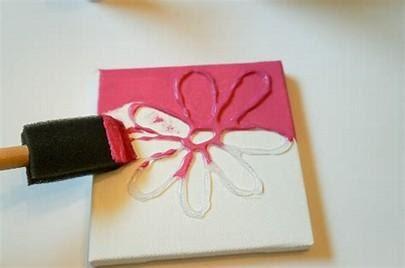
Make a stencil for each child by cutting a simple shape such as a triangle, square or daisy from the center of a piece of cardboard. Place a piece of construction paper under the stencil and tape them both to a table. Pour paint into shallow dishes. 

ACTIVITY: 

Let each child dab paint over the open area of the stencil. Remove stencil and place painting on newspaper to dry. Other colors may be stenciled onto the same picture when the first color has dried. 

SENT IN BY: Betty , Columbus, OH 

VARIATION: From Lois, Webster City, IA 

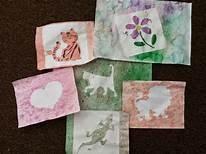
Cut Easter egg shapes from thin cardboard such as potato chip boxes. Attach loops of tape, sticky side out, to the backs of the shapes and stick them on sheets of paper. Let the children brush thinned paint around the edges of their shapes, extending out about an inch. It's not necessary for them to paint their shapes, but they probably will. Remove the cardboard shapes, leaving unpainted egg shapes in the middle of the papers. When the papers are dry, let the children decorate their egg shapes with crayons, if desired. 

VARIATION: From Lois, Webster City, IA 

Follow the same procedure to make car, bus and airplane shapes to be used for a transportation unit. This method is similar to spatter painting. but it goes faster and is less messy. 

VARIATION: From Carole, Pittsburgh, PA 

Cut out flower shapes, trees, cars or geometric shapes to make stencils and tape them on large sheets of white paper. Then let the children shade over the edges of their stencils using the sides of peeled crayons. 


More Easy  ARTventures in Painting
PAINTING with ice 

A picture containing swimming

Description automatically generated

MATERIALS
MEDIUMS   -Ice cubes-finger paints - blue Liquid hand soap 

IMPLEMENT-Hands 

SURFACE  -White finger paint paper 

ACTIVITY 

Put an egg sized gob of blue paint on the paper. Plop the ice cube into the paint. Add a little soap. Move the ice cube through the paint and all over the paper. 

Try to keep going until the ice cube is melted. 

Notes : 

We used blue paint because it reminded us of the ocean. They became delighted with the whole experience and went through three ice cubes. 


PAINTING with Q-tips 

MATERIAL
MEDIUM (8) Water colors -basic colors 

A picture containing person

Description automatically generated

Water 

IMPLEMENT (S) Cotton swabs 

SURFACE (S) 

White construction paper 

SUGGESTED DIRECTIONS 

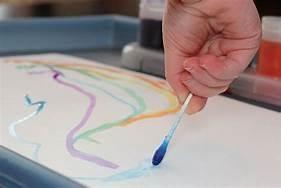
Dip the cotton swab in water and dab it on the paper. Drag it on the paper. 

Write with it. 

Draw with it. 

Notes: 

This experience makes me think of chinese drawings and paintings. The cotton swab makes such a delicate mark on the paper. 

You can make some wonderful pastel colored, dreamy pictures. 


PAINTING BOXES

MATERIALS
MEDIUM (S) 

Learning Activities Archives - Thriving Home

Acrylic house paint - white 

IMPLEMENT (S) 

Paint roller with handle Paint tray 

SURFACE (S) 

Large cardboard box (appliance box) 

ACTIVITY 

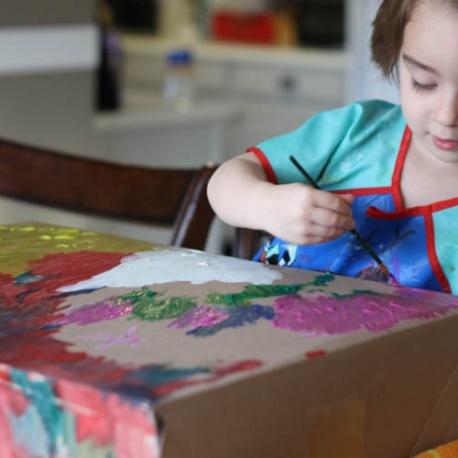
Pour the paint into the tray. Practice rolling the roller in the paint and taking off some of the paint before putting on the surface. You can drag the roller to the high part of the tray and roll some paint out or drag the roller across the edge of the tray. Maybe you have other tricks. 

Roll the paint onto the cardboard box. 

Notes: 

We tumed our freshly painted box into a house. I took different colored plastic film (the stuff you get at Easter time) and made a red, blue and yellow window. My students with autism love to look through these colored windows. 


PAINTING with a turkey baster or eye dropper 

A picture containing person

Description automatically generated

MATERIALS
MEDIUM (S) 

Poster paint - red, yellow Liquid hand soap 

IMPLEMENT (S) Cooking baster or Eye dropper 

SURFACE  Vinyl 

ACTIVITY 

Mix the paint with a little soap. 

RII the cooking baster with the red paint and dribble or gush it all over the vinyl. RII the eye dropper with yellow paint and dribble or gush it all over the vinyl. Compare the two. Did the baster make a different pattern than the eye dropper? What color did the two paints make when they met each other on the vinyl. 

Notes: 

This is another good tool to make the child's name with. That personalization of the experience is important to children. 

OBJECTIVES 

Fine Motor Writing Skills Perceptual Motor 

Concept Development - colors, sizes 


A picture containing table, person, indoor, little

Description automatically generated


PAINTING WITH A POTATO MASHER 

OBJECTIVES 

MATERIAL MEDIUM (S) 

Rnger paint - yellow Uquid hand soap 

IMPLEMENT (S) Potato masher- 

with the holes in the end 

SURFACE (S) 

Red construction paper 

ACTIVITY Mix the paint with a little soap. 

Hold the handle of the masher and place it in the paint. Place it on the paper. Pick it up and put it down. 

Rub it on the paper. 

Drag it on the paper. 

Notes

I use finger paint for this experience because it is thicker and clings to the potato masher. 

We did this on grass one time. The grass was mowed before it rained, and it was interesting to see how our designs changed after the grass was wet. 


PAINTING WITH SHOES

MATERIAL MEDIUM (8) Poster paint- 

A picture containing bedclothes

Description automatically generated

green, yellow, and blue 

IMPLEMENT (8) Old shoes - 

tennis, football, high heels, etc. 

Socks 

Bare feet 

ACTIVITY 

Mix: the paint with a little soap. 

Let the child select a pair of shoes and a color. 

Put the shoes on and walk through the color and on to the cardboard. Hop, skip, dance, jump, slide, etc. 

Do three children per piece of cardboard with each child using a different color paint. 

The same three children repeat the experience with old socks, using the same color paint on a new cardboard. 

The same three children repeat the experience with bare feet, using the same color paint on a new cardboard. 

Notes

This experience can be a little slippery when using bare feet, so have helping hands ready to sup-port the one in the paint. 

We have done this on the sidewalk, and it is fun to watch the feet disappear with rain and time. 


PAINTING  WITH A SPRAY BOTTLE

A baby playing with a toy

Description automatically generated with medium confidence

MATERIAL MEDIUM (S) Poster paint - 

red, yellow, and blue, Liquid hand soap 

IMPLEMENT (S) Spray bottle (for plants, cleaning liquid. etc.) 

SURFACE (S) Sidewalk 

Cardboard cut into shapes (circle, square, triangle) 

Water (See photo)

ACTIVITY 

FII the spray bottle with paint and a little soap. Place a shape on the sidewalk. 

Stand above it and spray until it is covered. 

Remove the cardboard and look at the shape you made. 

Wait until it rains or snows and see what happened to your shape. 

Notes: 

We always experiment with the type spray we want. A lot of bottles have a stream or a spray to choose from. 


PAINTING WITH BUBBLES 

MATERIAL MEDIUM (S) Soap bubbles 

A picture containing text, set

Description automatically generated

Food coloring - red 

IMPLEMENT (S) Bubble wand 

SURFACE (S) 

White finger paint paper 

ACTIVITY 

Add a few drops of the food coloring to the bubbles. Dip the wand in and blow onto the paper. 

If you want a more intense color, add more coloring. 

Notes: 

Don't stand too close to the paper or the bubbles will splatter in your face and give you freckles. We like to put the paper on the floor and stand over it. If the bubble liquid drips, it then drips onto the picture and becomes part of it. 

This is a good activity for children who are having delays in speech. The act of blowing is an important part of speech development. 


PAINTING WITH FUNNELS

MATERIAL MEDIUM (S) 

A picture containing little, child, person, child

Description automatically generated

Poster paint - yellow liquid hand soap 

IMPLEMENT (S) Large funnel Small funnel 

SURFACE (S) Sandpaper - medium 

ACTIVITY 

Mix the paint with a little soap. 

One person holds the funnel over the paper while another person pours the paint into the funnel. The paint should be of the right consistency to flow through the funnel. 

You can move the funnel around to create a line or let the paint drip out for a dot effect. Make your name. 

Make a design. 

Notes: 

When we have too much paint on our surface, we sometimes pick the sandpaper up, tilting it different ways, to create an entirely new design. The children like to watch the paint flow this way and that. 


PAINTING ROCK PETS

MATERIAL MEDIUM (S) Poster paint -red, yellow, blue 

Pet Rocks - Process Art Painting Activity for Preschoolers

Liquid hand soap 

IMPLEMENT (8) Paint brush 

SURFACE (8) Rocks - 

smooth, rough, big, little 

ACTIVITY 

Mix the paint with a little soap. 

Go on a nature walk and gather rocks. Bring back whatever you can carry. Paint smiley faces, pictures, designs, etc. on the rocks. 

Notes: 

If you have a child, I am sure that at one time or another you have received a painted rock to be used as a paper weight. I have one on my bookshelf that is a treasured item. It is painted gold with the date added by the teacher. 

Another variation of this experience is to use the rock as a paint brush and control the paint on the surface with it. 


16 Things to Paint Besides Paper

May 7, 2014  Rachael

My girls love to paint.

16 fun things to paint besides paper

Okay, so my three-year-old loves to paint.

My one-year-old loves to suck on the paint-covered brushes. Or (more accurately) she loves to see my reaction to her sucking on the paint-covered brushes.

But seriously, they both spend a lot of time painting. (Often with edible paint for obvious reasons.)

Usually we just paint on paper, but my daughters have recently discovered white ceramic figurines (like this car bank). I like them too, but I’m too cheap to let them each paint a new one every day (even though I get them for $1 at Walmart). So I’ve been searching online for things to paint on besides paper. I found a bunch of fun ideas, so I thought I’d share them with you! Bonus: decorating a blank canvas of any texture or type is a great form of process-based art. Process art encourages confidence in their artist abilities and gets those little creative wheels spinning!

Blocks–I think this idea on Creative with Kids is brilliant!

Cork Board –something I never would have considered! Great idea from Buggy and Buddy.

Toast using edible paint from Learn Play Imagine.

Plates—It’s Genius! They are always near the table.

Canvas--while there are plenty of obvious ways to paint on canvas, this name-resist idea from Mama Papa Bubba is the one I want to try most.

Wooden toys like airplanes are another favorite at our house. You do know we’re obsessed with airplanes, right?  And Jessica from Play Trains shared great ideas on how to paint/build/assemble train sets with little ones.

Out of the ordinary paint canvases! Wooden airplanes

Have you made suncatchers? If not, try this pretty version from Fun at Home with Kids!

Windows- It’s always fun to paint on a new surface!

Aluminum foil as seen on NurtureStore. Why I haven’t I tried this yet?!

The sidewalk. Need a recipe? Try this fizzing sidewalk paint from Kids Activities Blog. Or Chalk Paintworks too.

Snowsnow paint has just two ingredients!

Out of the ordinary paint canvases--snow paint

Painted tea towels would make a nice gift for the practical relatives in your family.

Rocks. This was 100% my daughter’s idea. She had a few big rocks, and she asked if she could paint them. We have plenty of rocks near our house, which makes this one of the cheapest options! Good thinking, kiddo! Similarly, my girls decorated little handmade fossils at our local Earth Day celebration. How fun!

Picture frames — if I were to receive a gift like this one from My Life of Travels and Adventure, I would be a very happy mama.

Mirrors-– I’ve been checking yard sales for small mirrors so my girls and I can try things like this from Happily Ever Mom.

Your bathtub. We like to fill a cupcake pan with shaving or whipped cream and different shades of food coloring. Bath paint is fun paint.

Seashells–this idea from Fantastic Fun and Learning resulted in beautiful, brilliantly colored vacation souvenirs!

9 Tips for Painting with Infants – The Stay-at-Home-Mom Survival Guide
Smart Art for Your Burgeoning Mini Monet – Conceiving Piper
Gooey Color Paint Exploring ~  Powerful Mothering
Exploring: Color Ice Play ~  Powerful Mothering
Baby Safe & Edible Finger Paint ~  Wildflower Ramblings

Open Ended Baby Play with Wet Chalk ~ Lessons Learnt Journal
Homemade Edible Whipped Paint ~ Fun at Home with Kids
Edible Jello Finger Paint  ~ Imagination Tree
Baby’s First Art ~ Baby Center
2 Ingredient Baby Safe Paint ~ Learn Play Imagine

Sticker Resist Father’s Day Card

This personalized sticker resist card is easy for toddlers to make for Father’s Day!
I prepared the craft by using some foam stickers to spell out “DADDY” on one end of the card.

A picture containing text

Description automatically generated

Then Brandon painted all over the card – we used washable paint to help with cleaning up afterwards!  He used a big range of colors and that was fine – it’s his project!

When the paint was dry I carefully removed the stickers and folded it in half to make a card.

This type of painting could be used for making cards for any birthday, event, or celebration!


EASY CLEAN UP BATH PAINT RECIPE

1/2 cup corn starch

1/2 cup shampoo, hand soap, or shower gel (anything soapy that you would use on your toddler)

1/4 cup water

1/2 cup cornstarch

Add 1/2 cup hand soap

Mix then add 1/4 cup water

Make sure to mix the cornstarch and soap/shampoo first. Then mix in the the water 1 tablespoon at a time (with a total of 4 tablespoons) to keep the mix from getting sudsy.

Then you can pour it into a muffin tin, ice cube tray, or painter palette. Add 2-3 drops of food coloring into each one. This is a great opportunity to let your toddler have some “control” by choosing which colors they want.

You can let them paint with their fingers or give them some chunky paint brushes to use.

This one held her attention for a good 20 minutes!

Toddler Paint Bath Sensory Art


Give your toddler paint bath time for a fun sensory art experience, and maybe even a little break for mommy. They’ll love making a giant mess in the tub, and you’ll love how easily it washes away!

Toddler Paint Bath


Toddler Paint Bath Mess

Welcome moms, to the world of bath paint.

Plop your toddler in the tub, give them a palette of colorful homemade bath paint, and you will have a happy camper. 

Toddler Paint Bath

Or you could be like me and stand there the whole time laughing and taking pictures.
Because you will seriously LOVE watching a first-time toddler paint in the bathtub.

It starts with uncertainty, wondering if you’re really telling them it’s okay to make a mess.

Then a timid exploration of dipping their fingers in and finger painting on the surface of the tub.

Toddler Paint Bath

But soon they will be relishing the sensory experience, and are likely to cover their entire body, as well as the tub. It’s really entertaining, and a fun bonding experience.

TIPS FOR A STRESS FREE TODDLER PAINT BATH

Make sure your soap/shampoo to corn starch ratio is correct. 
You need a 1:1 ratio. Too much soap and it doesn’t really paint. Too much corn starch, and you may end up with a purple child. Yes, I tested this theory just for you! (If you do accidentally use too little shampoo, fill your sink with warm water and a scoop of Oxi Clean to wash their hands in.)

Toddler Paint Bath

Set age appropriate expectations and boundaries. 

When Corban was barely two, my only rule was to “Keep the paint inside the bath”. As he grew older, I started incorporating more rules that allowed him to to have a toddler paint bath without supervision. Things like “You have SIT during a paint bath” or “No painting your hair”. The hair rule is for my own sanity because he hates getting water on his face and rinsing the paint out undid all the fun of the paint bath.

Check in and encourage them or join them.

 The joy of the toddler paint bath is that they are contained, and there’s no water. You will be tempted become distracted. You will be missing out on their fun and cheering their creativity. It also took some time to make sure both kids knew and followed the rules (mostly keeping the paint IN THE BATH!).


Superscript

Block title

This is a block description. To edit, click and type the text or replace it with your own custom content

baby sensory activities

Easter Egg Hunt Sensory Bin

4 / 12 / 17

Easter Egg Hunt Sensory Bin | Mama Papa Bubba

With this upcoming Easter being the first that Sam will actually get to participate in the festivities, I figured we’d better give him a chance to practice his egg hunting skills if he’s to stand a chance against his quick and experienced big sister.  Well, that or we had 45 minutes to kill between arriving home from a day of errands and picking up Grae from school and the Easter stuff just happened to out begging to be played with. :)  Either way, Sam has absolutely been loving our collection of little plastic Easter eggs and this Easter egg hunt sensory bin was a total hit.  

Read More

3 comments

Exploring Hook-and-Loop Fasteners

2 / 20 / 17

Exploring Velcro | Mama Papa Bubba

When Miss G was born full-term the day after my due date, making sure she met milestones reasonably ‘on time’ wasn’t something that was even on my radar… We simply trusted that she’d develop new skills as she was supposed to and celebrated them when they came along.  With Sam, our little preemie babe born 27 weeks into my pregnancy, it’s a different story… Thankfully he’s done remarkably well in his first year home from the NICU, but his development has been closely monitored every step of the way and I’m much more aware of what he’s supposed to be doing at each stage.  So when our baby boy developed a fascination with the hook-and-loop fasteners on Sister’s well-loved school sneakers, the first thing that popped into my mind?  ‘Ooooh – what awesome fine motor practice!’  Seriously, this is how my mama brain thinks now. {Also,  did you know that when we use the term “velcro”, we’re actually using a brand name to describe hook-and-loop-fasteners??  Me neither, but the team over at  VELCROⓇ Brand kindly let me know that it’s much like using the term “kleenex” to describe all tissues…  You learn something every day I guess!}

Read More

3 comments

Baby Play Dough

1 / 29 / 17

Baby Play Dough | Mama Papa Bubba

If you know me well, you know that my love for play dough runs deep.  I’ve loved it for ages… It was a total lifesaver while babysitting and nannying as a teenager and university student, it was a staple in my Kindergarten classrooms when teaching, and it’s always out and available in our house now that I’m a mama.  Over the years, Miss G and I have created some pretty amazing recipes…  Amazing sand dough, gorgeous starry galaxy doughlemony dough made with real lemon zest, chai tea latte dough, super soft chocolate doughcelebration dough full of foil glitter, the most fragrant ever gingerbread doughvanilla mint dough {one of my favourite ever scent combos}, pumpkin spice dough made with real pumpkin…  The list could go on.

Read More

8 comments

Water Bead Play for Babies

1 / 15 / 17

Water Bead Play for Babies | Mama Papa Bubba

I love, love, love water beads and because Sam absolutely loves anything big or small that is ‘ball’ shaped, I knew he’d love them too.  The trouble is that we’re still very firmly planted in the put everything in the mouth stage.  Old food bits on the floor, dry crunchy leaves, shoes, tissues, sand…it all goes straight into his cute little mouth.  So we’re definitely not ready for a water bead sensory bin just yet.  That being said, a water bead sensory bag – YES!  Putting different activities and materials into a large zip-close bag and taping the top shut is my go-to move when it comes to fun for this little one of mine.  It allows him to explore so many things that would normally either be unsafe or at the very least, extremely messy {not that there’s anything wrong with mess – getting messy is important too} and this little water bead play for babies set-up has been a total hit so far!

Read More

2 comments

Discovery Baskets for Babies and Toddlers

1 / 3 / 17

Discovery Baskets for Babies and Toddlers | Mama Papa Bubba

Miss G and I have been having such fun putting together fun little discovery baskets for our sweet Sam to discover and explore.  He loves them because it means that he gets to put his curious little hands all over all kinds of things he may not often have the opportunity to explore, and I love them because they’re fun and super easy to pull together.  Plus I get to watch him very carefully inspect each object independently, which in my mama opinion, is the cutest thing ever.

Read More

8 comments

DIY Sensory Blocks for Baby

11 / 13 / 16

Homemade Sensory Blocks for Baby | Mama Papa Bubba

Goodness…  I’m pretty sure I put making these simple little sensory blocks on my to do list about 3 months ago.  It’s ridiculous that it’s taken me this long to get to them given the fact that the entire project took about 10 minutes start to finish, but feel like that’s just my current state of life.  Non-priority tasks aren’t happening as quickly as I’d like them to, but it is what it is.  Either way, they’re made now, and I’m so happy with how they turned out!  Sam loves them too, which is exactly what I’d hoped for.  They’re sort of like a combination of a miniature sensory bottle {making them perfect for little hands} and these really fun little sensory blocks that I was highly considering buying online late one night {making them  perfect for stacking and crashing}.  They’re also part musical instrument, so multi-purpose indeed {hah – have I sold you on making a set for your bub yet??}

Read More

4 comments

{Baby Play} Exploring Hot and Cold

9 / 23 / 16

Exploring Hot Cold | Mama Papa Bubba

Oh goodness… Have this little guy and I ever been having fun lately!  When Miss G was this same age, we were in a major state of transition {hello packing up an entire life overseas, moving home to Canada, staying with family for several months, and then resettling in a different city} and doing fun little activities probably wasn’t at the very top of my priority list.  But this time around, things are different…  We’re a year into being back in Canada {for the second time}, Miss G is now in school full days {*gasp*}, and I get to spend my days with our sweet little preemie babe who seems to be curious about almost everything.

Today’s fun?  Exploring hot and cold – a very simple activity inspired by the curious little hands wanting to investigate my cup of morning coffee. 

☺

Read More

3 comments

Baby Sitting Practice Using Sensory Bags

9 / 21 / 16

Baby Sitting Practice Using Sensory Bags | Mama Papa Bubba

We did it!  At 10 months actual age and 7 months corrected, our little preemie babe born at 27 weeks is sitting up independently!  It took some time obviously, but my goodness – is being able to sit up ever a game changer!  And not only for him and his play either…  For me too- hello, being able to set your baby down on the ground for just a minute while you put on your shoes!  Have I mentioned that I’m so proud of this little guy?  The moment a ‘oh goodness, he’s so behind’ thought even considers creeping into my head, I remind myself that there was a time not very long ago that I wasn’t even sure we’d be leaving the hospital with our baby and gain some quick perspective.  And so we celebrate each new milestone {whenever they happen} instead. 

☺

Read More

16 comments

Polka Dot Sensory Bag for Babies

7 / 17 / 16

Polka Dot Sensory Bag for Baby | Mama Papa Bubba

This afternoon, with Brad outside mowing the lawn and Miss G being his water / sweat rag girl {hah!!}, I thought Sam and I would try something fun while doing our daily tummy time play.   Since our tummy time painting was a hit a few days ago, I figured we’d give a sensory bag a go this time around. My initial thought was to create a quick and easy bag that was clear gel or shampoo based, but we had neither on hand… so water it was!

Read More

3 comments

Tummy Time Painting

7 / 12 / 16

Tummy Time Painting | Mama Papa Bubba

This little bub.  Gosh, he melts my heart.  At 8 months old {and 5 months corrected} now, we’re working hard on building his strength and motor skills and he’s already come so far!  According to his physiotherapist, the number one thing we can do at this point to help his development along is tummy time.  I’m absolutely not a professional, but according to her, it’s sort of ‘the gateway’ to many of the other skills he’ll be working on mastering in the upcoming months.   

Read More

You Need To Know About Playdough Activities

Learn With Playdough

I don’t know about you, but I have fond memories of playing with playdough as a child.  I was having so much fun engaging in playdough activities that I didn’t even realize that I was learning.

Learning?….Yes! Playdough activities provide some of the best opportunities for learning and development in the early childhood years.  Here you will find everything that you need to know about playdough from benefits to recipes to creative activity ideas.
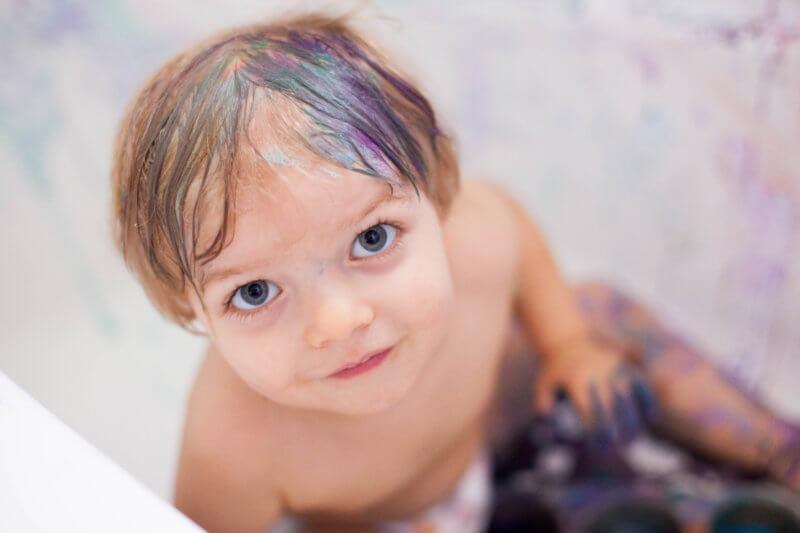
Find everything you need for playdough activities in your classroomor. Learn about the benefits of playdough, the best playdough tools, ideas for mix-ins, ideas for invitations to play, plus find printable playdough mats. A great resource to get ideas for your playdough center or station in your preschool or pre-k classroom, or if you want to get fresh ideas for fine motor or sensory activities. #playdough #preschoolactivities

This post contains affiliate links for your shopping convenience. I receive a small commission each time someone makes a purchase through one of the links.

space themed playdough tray

How To Make A Space Theme Playdough Tray

playdough trays for the whole year

How To Make Playdough Trays For Every Season Of The Year

all about me playdough tray

How To Make A Fun Playdough Tray For Your All About Me Theme

plant theme invitation to play

How To Make An Exciting Plant Theme Playdough Invitation

Benefits Of Playing With Playdough

While kids are squashing, smooshing, and shaping their blob of playdough they are also experiencing many benefits.

Fine Motor Skills

fine motor skills with playodugh

Manipulating the dough helps kids strengthen fine motor skills and enhance hand-eye coordination.  Developing hand strength, control, and dexterity in the little muscles of a child’s hands and fingers will help them out as they learn to grasp a pencil or learn to cut with scissors

Creative Expression

imaginative play with playdough

Playdough provides an opportunity for open-ended creation.  Kids can make whatever they want from the squishy stuff.  They can experiment with shape and texture.  They can pull it apart and make mold it together.  Playdough can easily be part of dramatic play as kids create birthday cakes, hamburgers, or bananas.

Math

playdough math activity

Kids can learn about measurement, sorting, counting, shapes, and size comparison.  Let kids help you mix up a batch of playdough and they can measure the ingredients for you.

Language & Literacy

What a great social activity!  When a group of kids plays together with playdough the opportunities to work on problem-solving, collaboration, and self-control are plentiful.  There are also lots of opportunities to build vocabulary as talk with each other and describe what they are making or doing.

Kids can create stories as they work in the playdough center.  They can also re-tell stories from books that were read to them or home or in the classroom. Playdough can also be formed into letters, names, or words.

Science

adding shredded foil to white playdough

At the playdough table, kids will investigate, experiment, and make observations about what they see and feel.  Provide kids with additional materials and mix-ins and give them the freedom to experiment with the material

How Do I Make Playdough?

Quick Playdough Recipe

quick playdough recipe

Brown Construction Playdough

best construction theme playdough

Bright White Playdough

make white playdough

Make Black Spider Playdough

spider playdough activities

Of course, you can buy Playdoh at the store, but it is pretty easy and inexpensive to make a DIY batch on your own.  Plus, when you make it yourself you can customize your batch with different colors, smells, and textures.

My Quick Playdough

I love making my quick playdough recipe.  This is the recipe that my mom used to make when I was a kid.  I don’t claim that this is a no-cook recipe.  Let me tell you a secret about all the no-cook recipes that I see out there…they involve boiling water….which is cooking.  I think that there is less risk for burns when I mix a batch up in a pan on the cooktop instead of having to pour boiling water from one container to another.  What do you think?

Color Tips And Tricks

Making certain colors can be a little tricky.   Here are some articles that will help you out:

Additional Playdough Recipes

Playdough Mix-Ins

Playing with playdough is a great sensory experience for kids.  Squeezing and squishing the material is a great calming activity.  Kids use their sense of touch to feel textures and movement as they shape, mold, and create.  You can add materials to your dough to change the texture, color, and even smell of your playdough to create new and exciting sensory experiences.

Here are some ideas:

8 Ways To Make Playdough For Your Construction Theme

Mix in soil for construction themed playdough

LEARN MORE

How To Make Christmas Tree Playdough

Make Christmas tree playdough

LEARN MORE

9 Mix-In Ideas For White Playdough

9 mix-in ideas for white playdough

LEARN MORE

Make Sparkly Christmas Playdough

Add tinsel to make sparkly Christmas playdough

LEARN MORE

Mix-Ins For Your Black Playdough

Mix-ins for black playdough

LEARN MORE

Easter Playdough Ideas & Mix-Ins

make Easter bunny playdough

LEARN MORE

Toys And Materials For The Playdough Center

You don’t have to spend a lot of money to get great tools for your playdough center.  Here are some ideas for tools that you can find in your kitchen, craft supply closet, toy box, garage, recycling bin, and nature.  If you want to purchase some great playdough tools, I have some recommendations for you as well.

playdough with kitchen supplies

Playdough Tools From The Pantry Or Kitchen

  • pizza cutters

  • plastic knives

  • forks

  • straws

  • silicone cupcake liners

  • small bowls or ramekins

  • measuring cups and spoons

  • cupcake pans

  • pie pans

  • stainer or colander

  • garlic press

  • melon baller

  • meat tenderizer (tool)

  • cookie cutters

  • rolling pins

  • potato smasher

  • spatulas

  • ice cube trays

Playdough Tools From The Workshop

  • putty knives

  • washer

  • nuts,

  • bolts

  • screwdrivers and other tools

Playdough with items from the workshop

.

silk flowers and buttons with playdough

Playdough Tools From The Art Supply Closet

  • buttons

  • marbles

  • beads

  • popsicle sticks and toothpicks

  • googly eyes

  • pipe cleaners

  • silk flowers and leaves

  • scissors

  • dowels

Playdough Tools From The Toy Box

  • small toy figures and animals

  • little erasers

  • legos

  • matchbox cars, trucks and construction vehicles

  • Mr. Potato Head parts

  • Small doll accessories

  • plastic food, kitchen items

Playdough Tools From The Recycling Bin

  1. empty spools

  2. small containers (yogurt, applesauce, take-out containers, etc)

  3. lids and bottle caps

  4. egg cartons

  5. foam peanuts

  6. plastic cutlery

playdough with items from nature

Playdough Tools From Nature

  • pinecones

  • twigs

  • pebbles and small rocks

  • shells

Addition Playdough Tools

Here are some great tools that you can purchase for your playdough center:


Create An Invitation To Play

Provide your kids with a playdough invitation to play to encourage them to explore different materials for open-ended creative opportunities.  You can easily create playdough trays or playdough kits for every theme, holiday, or season

Playdough Kits

In the age of COVID kids often cannot share supplies with others.  It’s easy to make individual playdough kits with small divided containers in a pencil box.
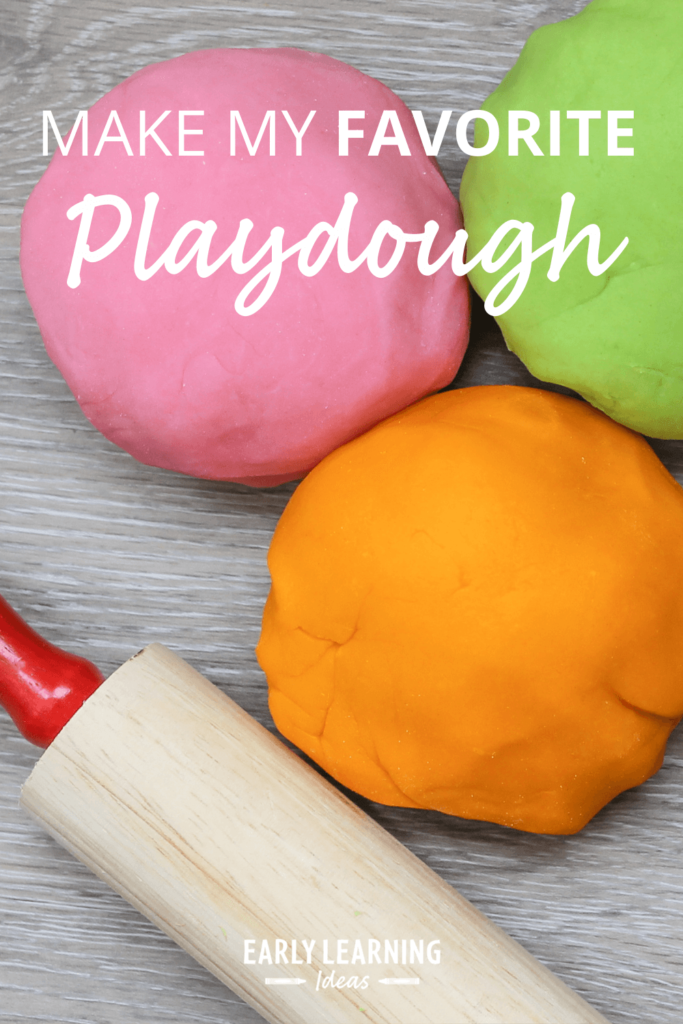
a playdough kit

Playdough Trays

When kids can share supplies, you can easily assemble a playdough tray by placing a variety of materials and tools, along with playdough in a divided tray.  Your kids will soon be exploring and using their imagination to make magnificent creations.
You can also add number cards or alphabet materials to work on math and literacy concepts in a playful and developmentally appropriate way.  Here are some ideas for some thematic invitations to play.
An Autumn Invitation To Play

an autumn or fall playdough tray

LEARN MORE

Construction Playdough Tray

Construction Playdough Tray

LEARN MORE

A Snowman Invitation To Play

A Snowman Invitation To Play

LEARN MORE

Winter Invitation To Play

Winter Invitation To Play

LEARN MORE

Spider Playdough Activities

Spider Playdough Activities

LEARN MORE

Turkey Invitation To Play

Turkey Invitation To Play

LEARN MORE

Christmas Theme Invitation To Play

Christmas Theme Invitation To Play

LEARN MORE

Monster Playdough Activity

Check out all of these monster ideas for your kids. Here are some simple learning activities that teachers can add to their monster theme, Halloween theme, or October theme unit and lesson plans. From process art and letter activities to math game printables and fine motor craft activities, your kids will have fun learning. Get out the play dough and the googly eyes for your children for some monster fun. #preschool #monsteractivities #halloweenactivities #prek #earlylearningideas

LEARN MORE

Bunny Invitation To Play

Bunny playdough tray

LEARN MORE

Apple Playdough Activities

Apple Playdough Activities

LEARN MORE

Butterfly Playdough Tray

Butterfly Playdough Tray

https://earlylearningideas.com/butterfly-playdough-tray/

LEARN MORE

Bug & Insect Invitation To Play

Bug & Insect Invitation To Play

LEARN MORE

Plant Theme Playdough Invitation To Play

Plant Theme Playdough Invitation To Play

LEARN MORE

Flower Theme Playdough Tray

Flower Theme Playdough Tray

LEARN MORE

All About Me Playdough Tray

All About Me Playdough Tray

LEARN MORE

Gingerbread Playdough Tray

Gingerbread Playdough Tray

LEARN MORE

Space Playdough Tray

space playdough tray

LEARN MORE

Playdough Mats

There are many ways to incorporate literacy and math learning into your playdough center.  You can use number cards, alphabet stamps or cutters, or plastic letters.  Playdough mats are also a wonderful addition to your playdough activities.  Here are some printable playdough mats that can be used.

Alphabet Playdough Mats

alphabet playdough mat

Number Playdough Mats

number playdough mat

Here are some additional playdough mats:

Playdough Resources From The Store

Use the following activities in my store with playdough.  Click on the images below to check out the hands-on learning activities from Early Learning Ideas.

printable playdough activity mat set


name activity for preschoolers


This is a frequently asked question?

This is a FAQ description. Add more detail about this service, such as benefits, appearance, components and value

This is a frequently asked question?

This is a FAQ description. Add more detail about this service, such as benefits, appearance, components and value